Author Management
The PrestaBlog author system goes far beyond simple article attribution. It offers fine-grained back-office access rights management, independent of PrestaShop permissions, and allows you to showcase your blog contributors on the front-office.
Why use the author system
The author system addresses several needs:
- Manage an editorial team with specific rights (writers, editors, moderators)
- Precisely control who can edit, publish or delete articles
- Display contributors on your blog (optional)
- Visually identify author responses in comments
- Create author pages listing all articles by a contributor
You can enable the rights management system without necessarily displaying authors publicly: this is useful for organizing a team in the back-office without it being visible to your visitors.
General author configuration
Author system activation
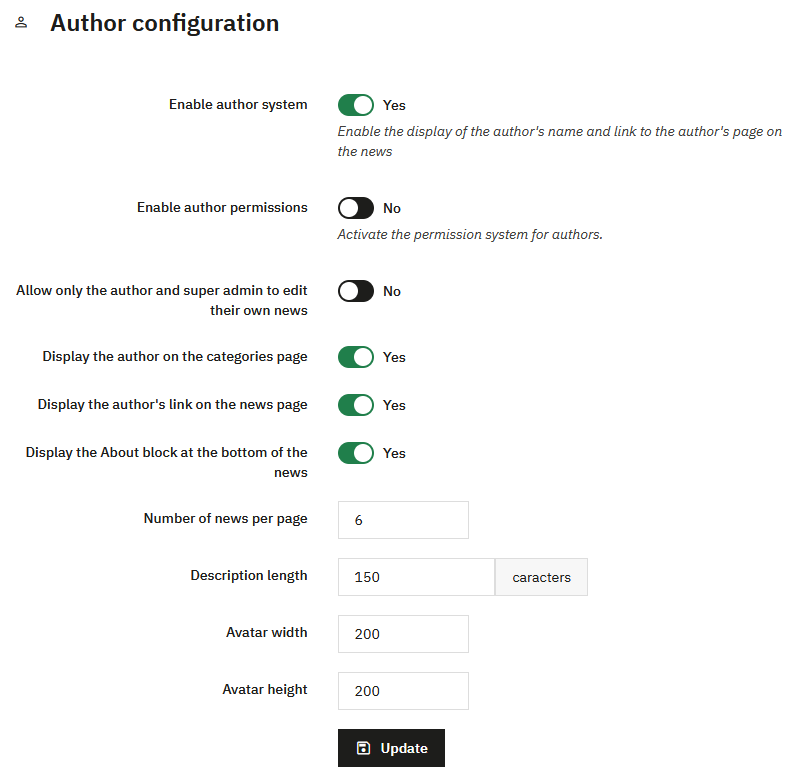
Enable author system
Enables the display of authors (and their link) on front-office news. The following options allow you to precisely control what is displayed.
Enable author permissions
Activates the author-specific rights management system. Without this activation, the permissions you configure will not be applied.
Allow only article author and superadmin to edit their articles
If this option is enabled, an author can only edit their own articles (unless you explicitly give them the right to edit all articles in permissions).
Display options
Display authors in category listing
Displays the author's name in the category article list on the front-office.
Display author link on article page
Creates a clickable link to the author's page, which lists all their articles.
Display About block at the bottom of articles
Displays a biographical block of the author at the end of articles (image, description, link to their page).
Author page settings
Number of articles per page
Number of articles displayed on the author page.
Description size
Maximum length of the author description (in characters).
Author image width and height
Dimensions of the profile image used in the About block and on the author page.
Click Update after configuring these settings.
Author creation and management
Author list
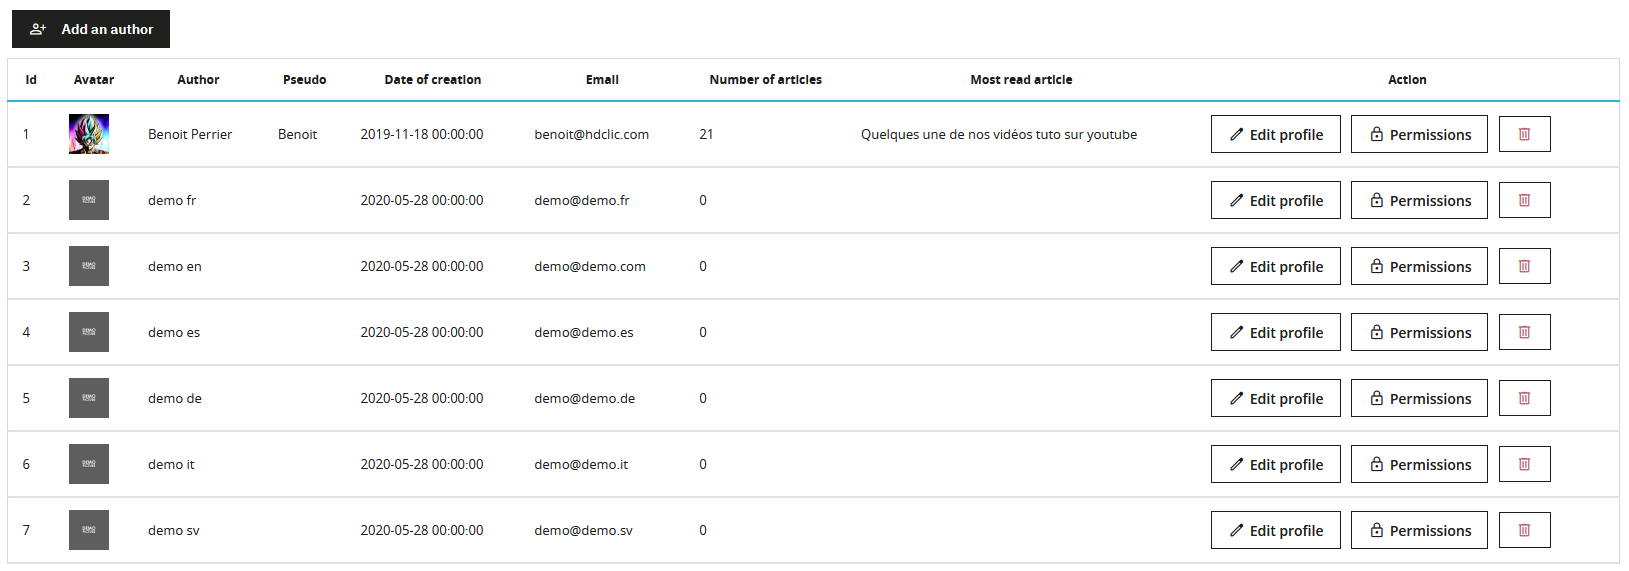
The author list displays all your blog contributors with their main information:
- Avatar and full name
- Nickname (used on the front-office)
- Creation date
- Number of published articles
- Last published article
For each author, super administrators have three actions available:
- Edit profile: edit the author's information
- Permissions: configure this author's specific rights
- Delete: remove the author from the system
Standard authors can only edit their own profile via the Author > My author profile menu.
Add an author
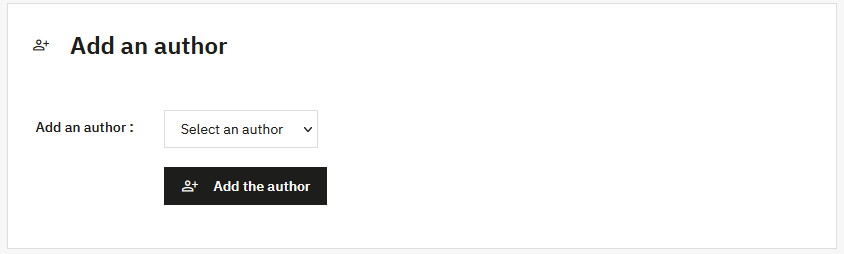
To add a new author:
- Click on Add an author
- Select an employee from the dropdown list (all PrestaShop employee accounts are available)
- Click on Add author
A PrestaBlog author must be linked to an existing PrestaShop employee account. You cannot create an author without an associated back-office account.
Author profile editing
Each author can edit their own profile via the Author > My author profile menu. Super administrators can edit all authors' profiles from the author list.
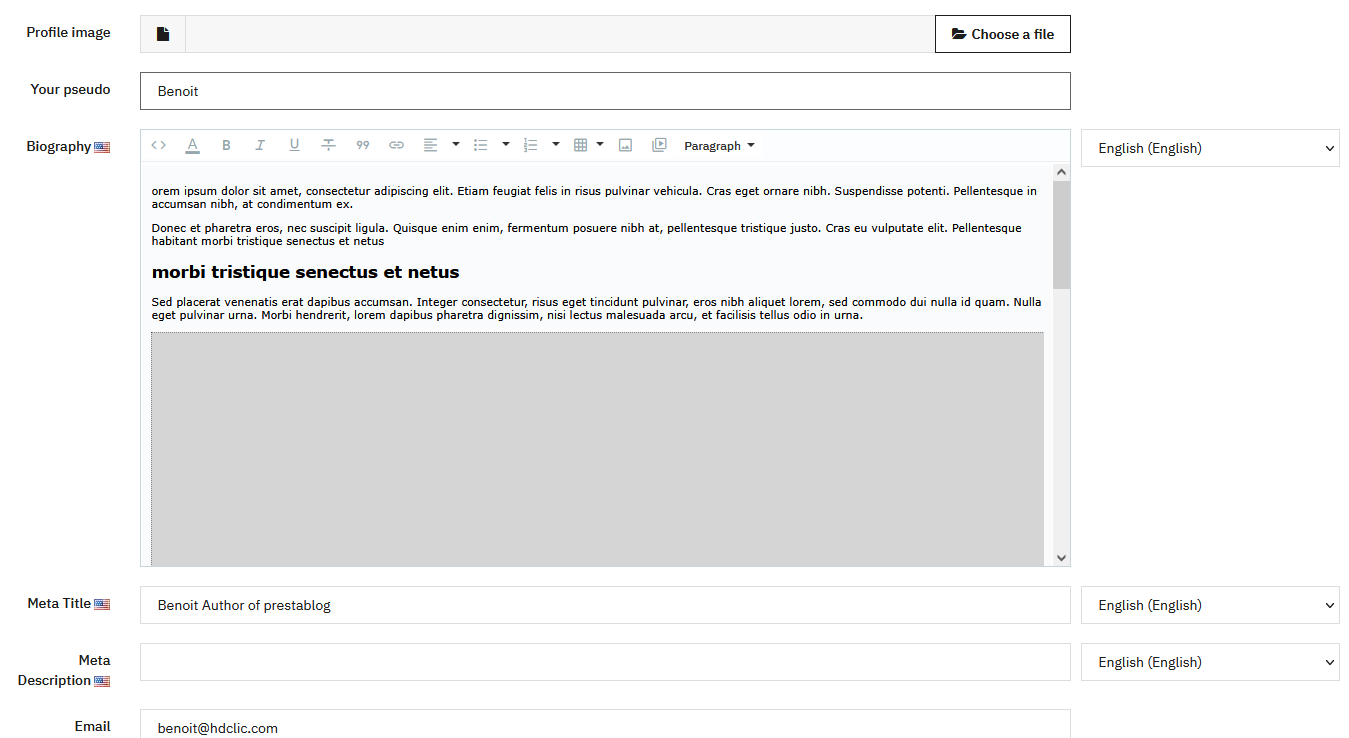
Profile image
Profile image
Add a profile image with the dimensions configured in the general author configuration. The image must be at the correct dimensions, without automatic resizing.
Profile information
Your nickname
Nickname displayed publicly on the front-office (not multilingual).
Biography
Author description, displayed in the About block at the bottom of articles and on the author page. This description can be enhanced with the text editor and is multilingual.
Author's email address (comes from the PrestaShop employee account, not editable).
SEO settings
Meta Title
Meta title of the author page (multilingual).
Meta Description
Meta description of the author page (multilingual).
Click Edit your profile to save changes.
Permission management
The permission system allows you to precisely define each author's rights, independently of PrestaShop rights. Only super administrators can manage permissions.
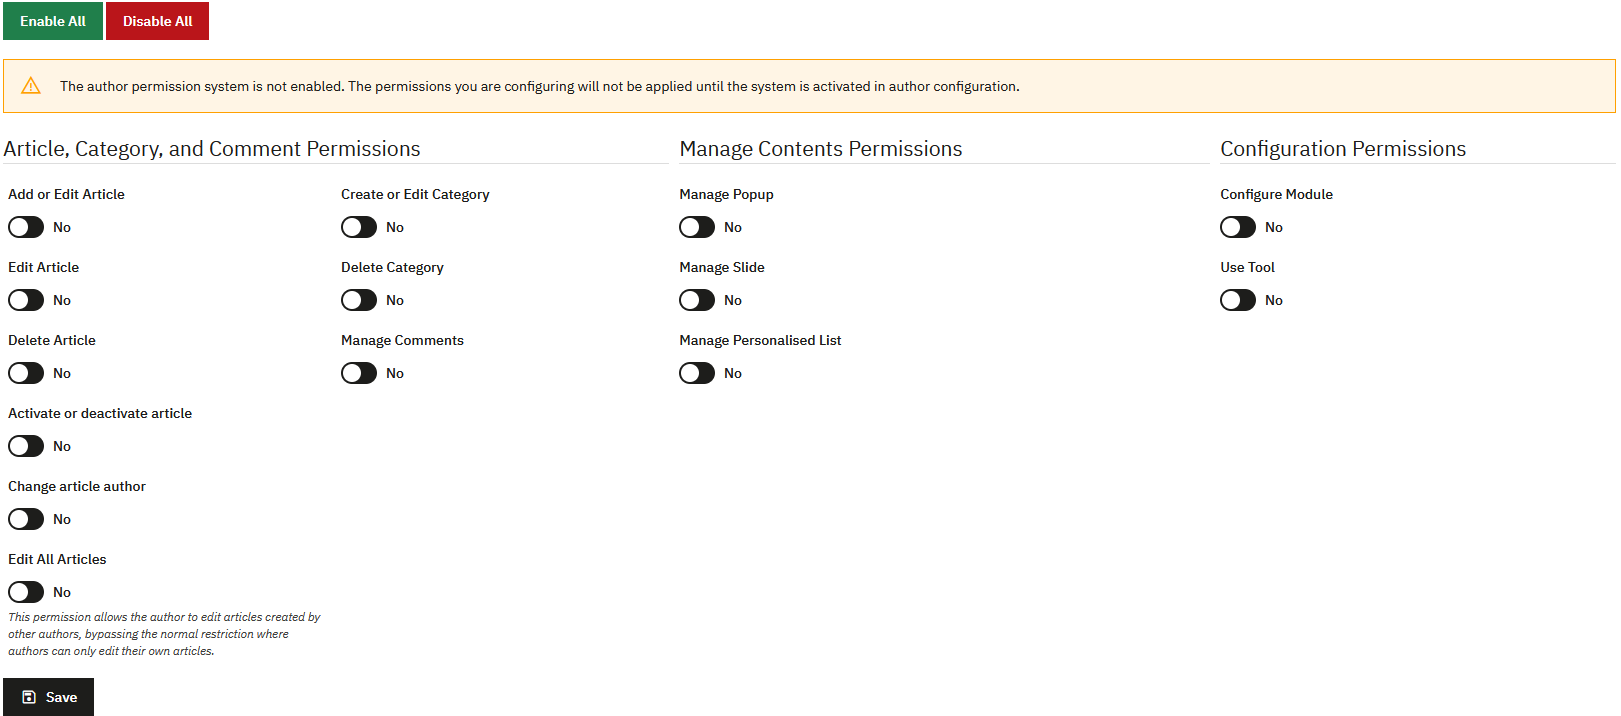
Permissions are only applied if the "Enable author permissions" option is activated in the general configuration. A warning message reminds you if this is not the case.
By default, a new author has no permissions. You must activate them manually according to needs.
Permissions for articles, categories and comments
- Add and edit an article: allows creating new articles
- Edit an article: allows editing own articles
- Delete an article: allows deleting articles
- Enable or disable an article: allows publishing/unpublishing articles
- Change article author: allows changing the author assigned to an article
- Edit all articles: allows editing articles created by other authors. This permission bypasses the "Allow only article author and superadmin to edit their articles" restriction if enabled in configuration.
- Create or edit a category: allows managing categories
- Delete a category: allows deleting categories
- Manage comments: allows moderating comments
Content permissions
- Manage Pop-up Windows: allows creating and managing pop-ups
- Manage slideshow: allows managing slides
- Manage Custom List: allows managing custom lists
Configuration permissions
- Configure Module: allows access to all PrestaBlog configuration (Configuration, Blocks, Theme, Images, Comments, etc.)
- Use Tools: allows access to tools (AI, Antispam, Import, Export, Image regeneration, Sitemap)
PrestaShop permissions for employees
In addition to PrestaBlog permissions, you can configure employee rights directly in PrestaShop to limit back-office access to the blog only. This combination allows very precise management of your writers' rights.
Why configure PrestaShop permissions
If you want a writer to only have access to PrestaBlog without being able to access other features of your store (products, orders, customers, etc.), you must configure their permissions at the PrestaShop level in addition to PrestaBlog permissions.
Two-level permissions
PrestaShop permissions control access to back-office menus and modules, while PrestaBlog permissions (previous section) control specific actions within the module (creating an article, moderating comments, etc.).
Create a dedicated blog role
To simplify management, you can create a profile (role) dedicated to blog writers:
- Go to Advanced Parameters > Team > Roles
- Click on Add new profile
- Name it (for example: "Blog Writer")
- Save the profile
Once the profile is created, you can assign it to your writer employees and configure its specific permissions.
Menu permissions
To configure menu permissions, go to Advanced Parameters > Team > Permissions and select the relevant profile.
In the left tab, Menu, check only the permissions necessary to access PrestaBlog.
Below you will find all the rights that will allow proper use of PrestaBlog (as on our demo):
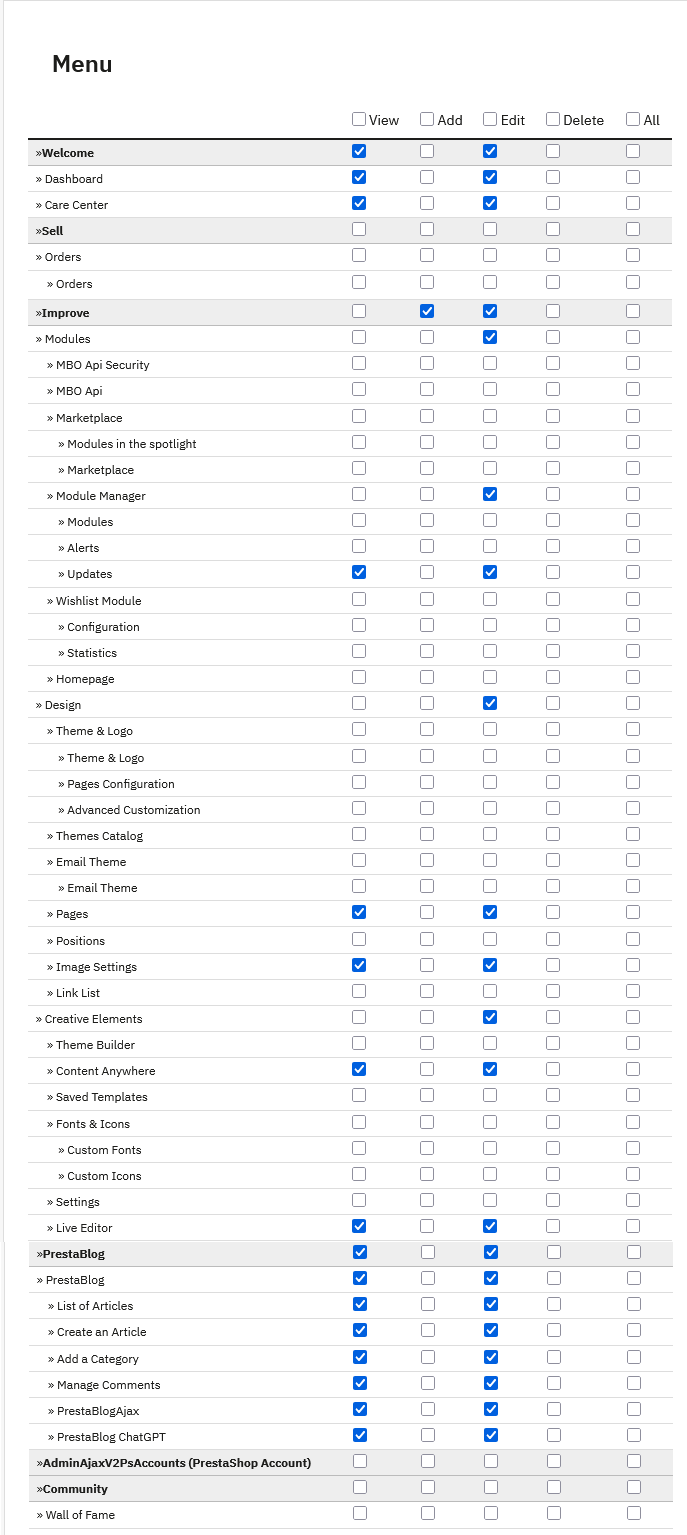
Minimum required rights:
- Welcome: View, Edit (required to access back-office)
- Dashboard: View, Edit
PrestaBlog rights:
- PrestaBlog: View, Edit
- Article list: View, Edit
- Create an article: View, Edit
- Add a category: View, Edit
- Comment management: View, Edit
- PrestaBlogAjax: View, Edit
- PrestaBlog ChatGPT: View, Edit (if you use AI)
Additional rights (optional but recommended):
- Design: View, Edit
- Pages: View, Edit
- Images: View, Edit
- Live Editor: View, Edit (wysiwyg editor for writing articles)
If you use Creative Elements:
- Creative Elements: View, Edit
- Content Anywhere: View, Edit
Labels may vary depending on PrestaShop versions.
Module permissions
In the right tab, Modules of the permissions page, configure access to the necessary modules:
- PrestaBlog: check View and Configure
- Creative Elements (if you use it to edit your articles): check View and Configure
Configuration summary
For a writer with limited blog access:
- Create a "Blog Writer" profile in Roles
- Configure Menu permissions for PrestaBlog only
- Configure Module permissions for PrestaBlog (and Creative Elements if used)
- Create the employee with this profile
- Add them as an author in PrestaBlog
- Configure their PrestaBlog permissions (previous section)