Content Management
This section covers the complete management of your content in PrestaBlog: creating and managing articles, organizing categories, moderating comments, as well as advanced features like custom lists, popups and slideshow.
Create & Edit Articles
- Article Management Interfacearrow_forward
- Writing Articlesarrow_forward
- Adding and Editing an Articlearrow_forward
- AI-Assisted Article Creationarrow_forward
- SEOarrow_forward
- Main Imagearrow_forward
- Introduction and Contentarrow_forward
- PrestaBlog Tools in TinyMCE Editorarrow_forward
- Using Creative Elementsarrow_forward
- Table of Contentsarrow_forward
- Category Associationarrow_forward
- Product and Article Associationarrow_forward
Article Management Interface
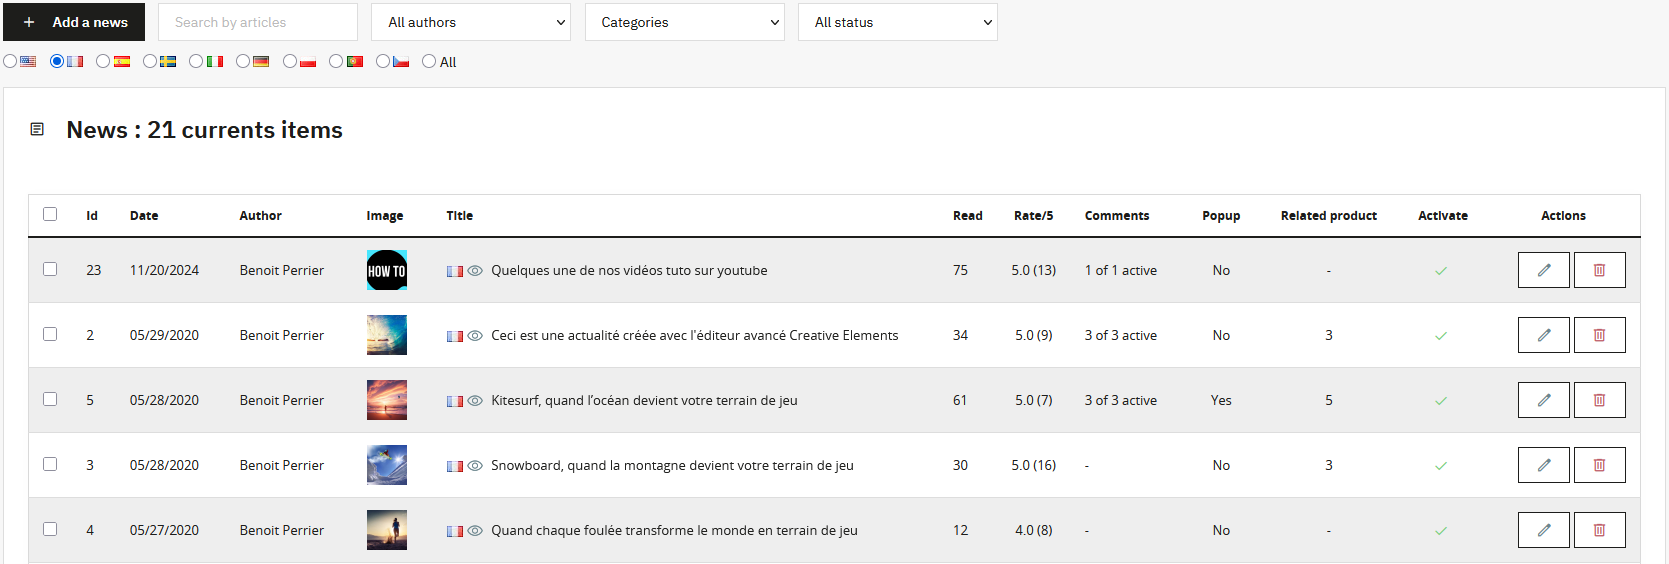
Article management relies on a dynamic interface that updates without reloading the page. This page allows you to search your content by article, author, category, status and language.
From this interface, you can:
- Edit or delete an article individually
- Select multiple articles for bulk actions (activation, deactivation, deletion)
- Load more articles to display more results
Writing Articles, the Heart of Your Content
Writing your articles is the core of your visibility. It's what allows your blog to perform well or, conversely, fail to achieve its objectives.
It is essential to produce original and useful content. Copying content from other sources creates duplicate content, which is immediately penalized by search engines.
Structure plays a central role. The article title corresponds to the H1 tag and is unique. Main sections should be structured with H2 titles, and subsections with H3. A clear hierarchy improves readability and allows search engines to properly value your content.
Adding and Editing an Article
When adding or editing an article, all fields (title, introduction, content and SEO fields) are multilingual if multiple languages are active in your store.
Tools available when adding or editing:
- AI-assisted article creation, focused on structure and SEO link
- Main article title (H1)
- Article activation or deactivation
- SEO tools: URL rewriting, meta title, meta description, keywords and redirects link
- Main article image link
- Introduction and main content link
- Table of contents based on H2, H3, H4 tags link
- Association with one or more categories link
- Related products and articles link
- Publication date management
- Pop-up association
AI-Assisted Article Creation
PrestaBlog offers an AI-assisted article creation tool. Its use requires prior configuration of an API key in the Tools > Artificial Intelligence section. (see the AI section)

Actions available via the AI assistant:
- Free discussion: allows you to freely exchange with the AI to clarify a point, structure a thought or explore a topic. Conversation history is preserved, allowing you to progressively build your content.
- Find topic ideas: from a general theme, the AI suggests several relevant article angles. Ideal for feeding your editorial calendar and identifying topics you wouldn't have considered.
-
Find SEO variation ideas: generates title variants,
associated keywords and subsection ideas (H2, H3) to optimize SEO.
This function is an excellent starting point before writing. - Write an article: generates structured content from provided elements (topic, outline, keywords). The result respects title hierarchy (H2, H3) and can be directly inserted into the editor. Use as a working base to customize.
- Create a summary: synthesizes long content into a concise introduction. Useful for quickly generating the article's "Introduction" field.
- Create a meta title: will suggest a meta title related to your article.
- Create a meta description: generates an impactful SEO description that encourages clicks in search results. Although less impactful for SEO, it remains important for click-through rate.
Insertion and translation
After generating content, you can automatically insert it into the corresponding field (title, introduction, content, meta description) or translate it into another language.
For insertion to work correctly, select the target language in the editing interface before clicking the insert button.
Content generated by AI should be considered as a working base. Systematically review, customize and enrich generated texts to add your expertise and tone.
Even if the generated content seems good quality, 100% AI content without human author touch will probably perform less well than customized content.
SEO
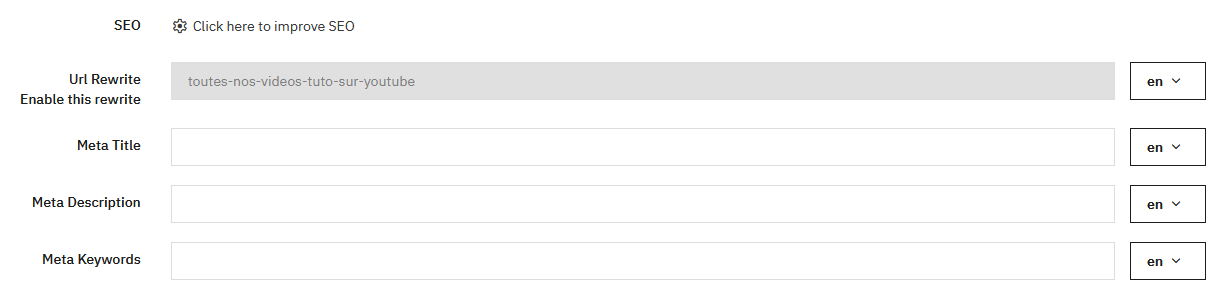
URL rewriting is automatically generated from the title when adding an article. Once the article is published, the URL is locked to avoid any SEO loss. However, you can unlock the URL to modify it by clicking "Enable or disable rewrite".
SEO Tips
- The meta title remains important, don't exceed 60-70 characters
- The meta description has little weight with search engines
- Meta keywords are no longer used
A permanent redirect URL is available to permanently redirect an article to another.
Main Image
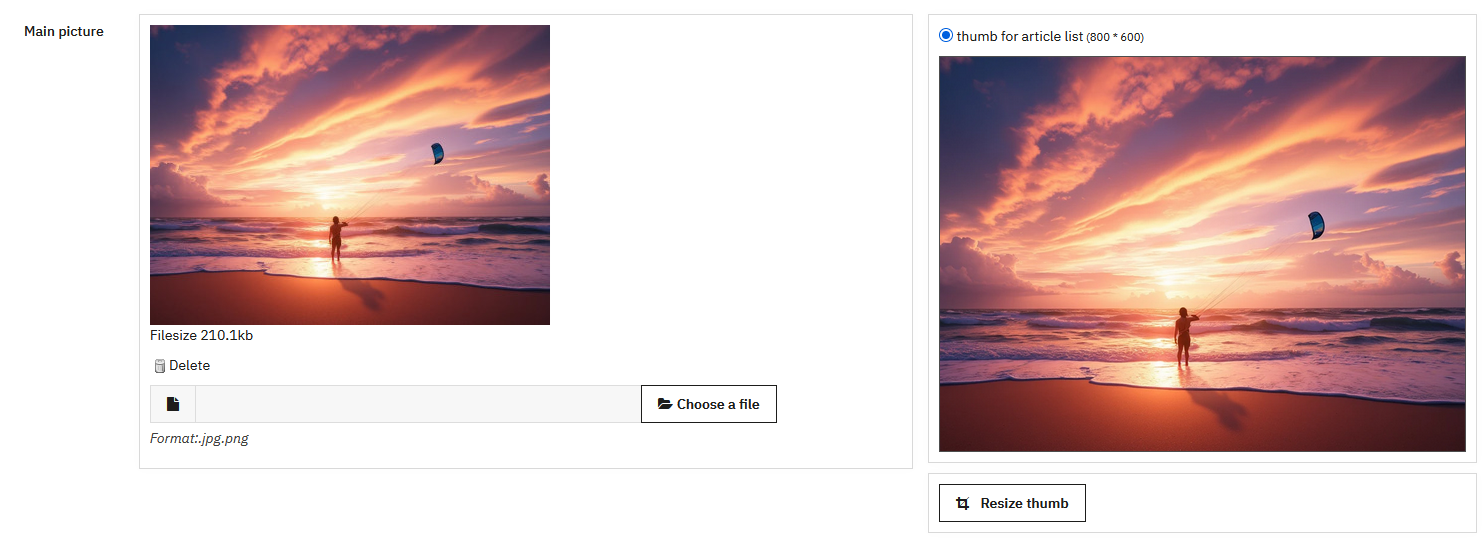
The main image is uploaded when the article is saved. For optimal rendering, upload an image with dimensions defined in the image size configuration.
PrestaBlog offers a resizing tool to adjust cropping. Images are automatically generated in JPG and WebP formats on the front office. However, for optimal quality, we recommend cropping your image directly in photo editing software, as server-side image resizing can sometimes alter image quality.
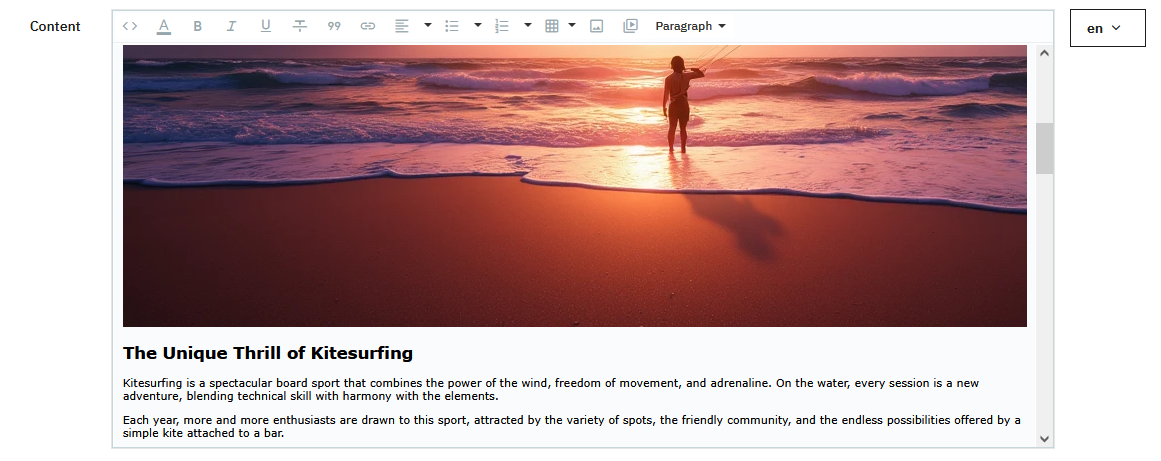
Introduction and Content
The introduction is displayed on category pages. It must be distinct from the main content to avoid duplicate content.
Content must be original, structured and useful. Use H2, H3, H4 titles to organize the article. Space out text and integrate illustrative images to capture attention.
PrestaBlog Tools in TinyMCE Editor
PrestaBlog integrates a dedicated toolbar directly into the TinyMCE editor, accessible via the PrestaBlog Tools tab. It brings together four layout features that turn a simple text editor into a real editorial tool: image galleries, column layouts, FAQ blocks, and reusable templates.
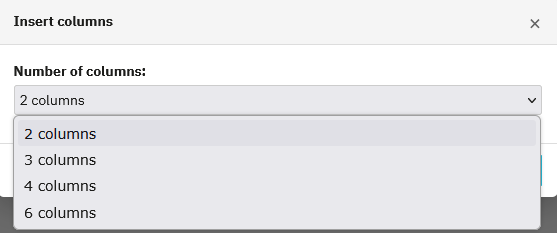
Columns
The column layout allows you to visually structure article content into 2, 3, 4, or 6 columns. It is the ideal tool for breaking up a dense page: placing an image on the left and descriptive text on the right, displaying several products side by side, or organising a list of highlights in a readable grid. This type of layout, common on professional websites, was previously impossible without editing HTML. PrestaBlog makes it accessible in two clicks.
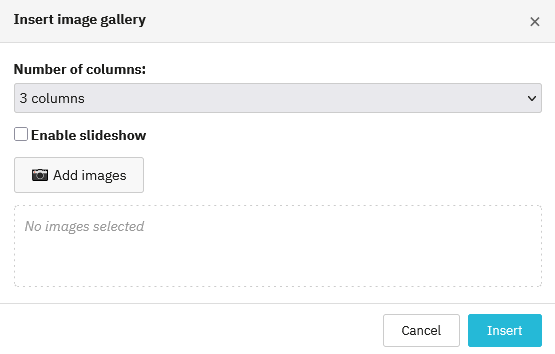
Image gallery
The gallery allows you to insert a set of images in a grid, with a choice of 2 to 6 columns. A slideshow option turns the gallery into an interactive carousel, with no additional plugin required. Ideal for product photos, client showcases, or illustrating a step-by-step tutorial. The result is clean, responsive, and integrates naturally into the article flow.
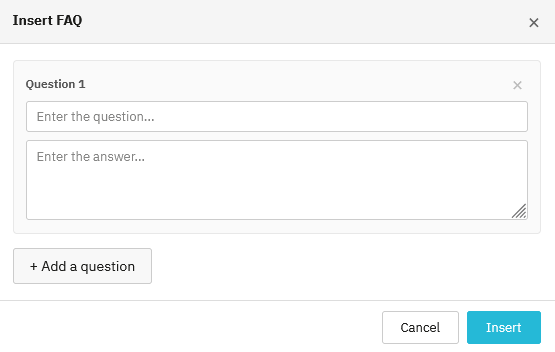
FAQ block
The FAQ block allows you to insert question-and-answer entries directly into the body of an article. Each entry consists of a question and an answer, and as many as needed can be added. PrestaBlog automatically generates the associated JSON-LD markup, allowing search engines to interpret the content as a structured FAQ. In practice, the questions can appear directly in Google search results as rich snippets, significantly increasing the article's visibility.
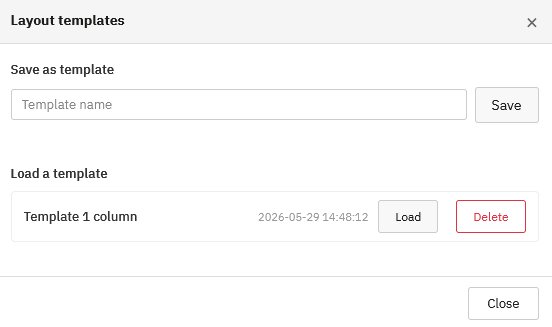
Layout templates
Once a layout suits you, a combination of columns, galleries, and FAQ blocks, it can be saved as a reusable template. A name, a click on Save, and the template is available for all future articles. This is a considerable time saver for teams who regularly publish content with an identical structure.
Using Creative Elements

PrestaBlog is compatible with Creative Elements for creating advanced layouts. The article must first be saved before using Creative Elements.
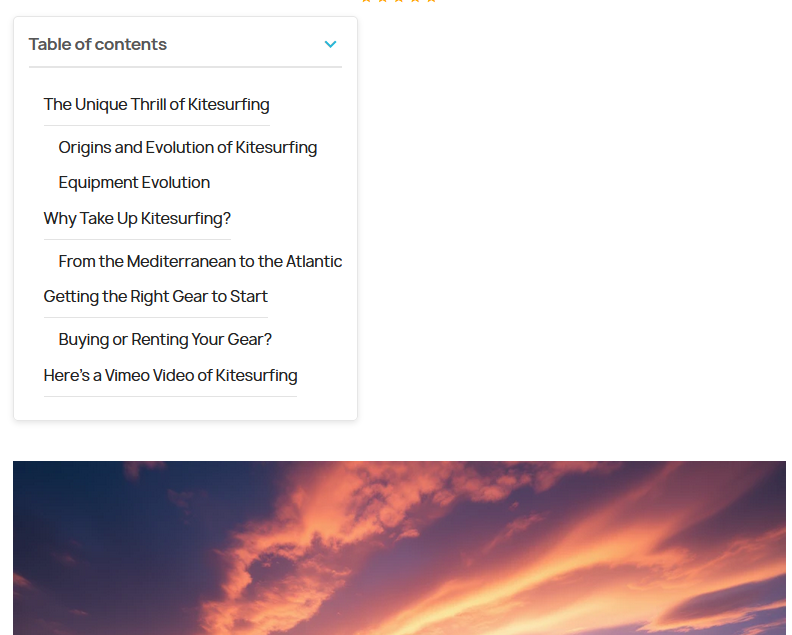
Table of Contents
The table of contents, if enabled, is displayed above the article. It is automatically generated from titles present in the content (H2, H3, etc.). Make sure to have sufficiently long paragraphs for the table of contents to be truly useful, otherwise it unnecessarily clutters your article.
Category Association
To publish an article, you must select at least one active category.
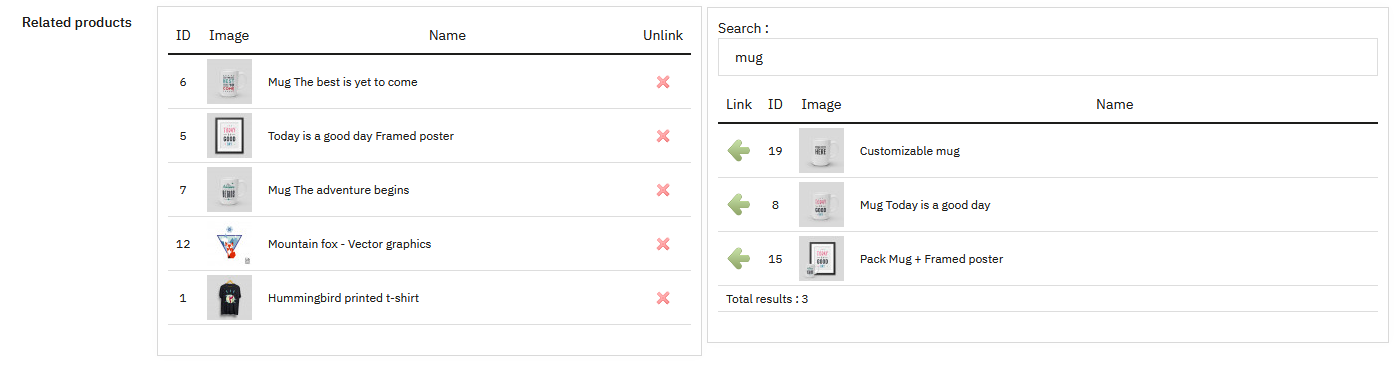
Product and Article Association
Associated products and articles are searched by name or ID. They automatically appear after selection and saving, at the bottom of articles.
Display on product pages
For blog articles to also display on product pages, enable the option Configuration > Global > Add a tab on product page.
Create & Edit Categories
Categories are the starting point of the blog. A first default category is automatically created, allowing you to publish articles immediately.
Subsequently, add as many categories as needed to organize content. Categories facilitate navigation and contribute to better readability for SEO.
Category Listing

From the category management page, you can:
- Add a new category
- Order categories via "Category Order"
- Edit an existing category
- Delete a category
Adding and Editing a Category
A category can be enabled or disabled. A disabled category is not visible on the blog but remains available in the administration.
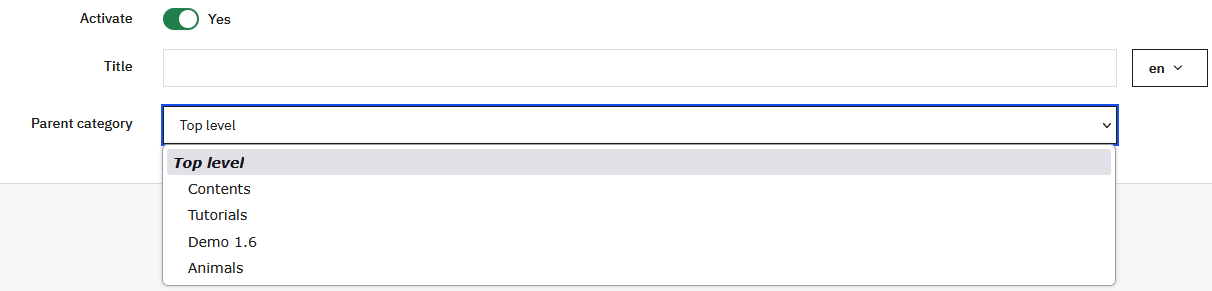
Each category has a title and can be attached to a parent category to create a subcategory tree. Top level indicates that the category is at the first level.
SEO Fields
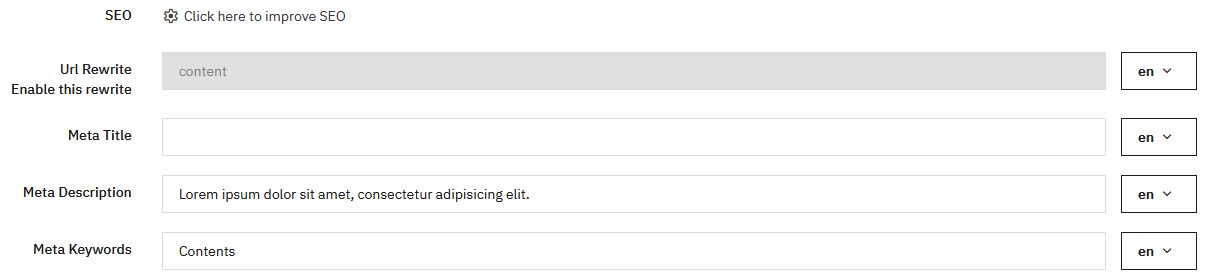
Each category has classic SEO fields:
- Meta title: the most important, must be concise and SEO-oriented
- Meta description: optional, little weight with Google
- Meta keywords: ignored by search engines
URL rewriting is automatically generated from the title but remains editable. However, it is locked as read-only; to reactivate its modification, simply click the Enable/Disable field button.
Description and Multilingual
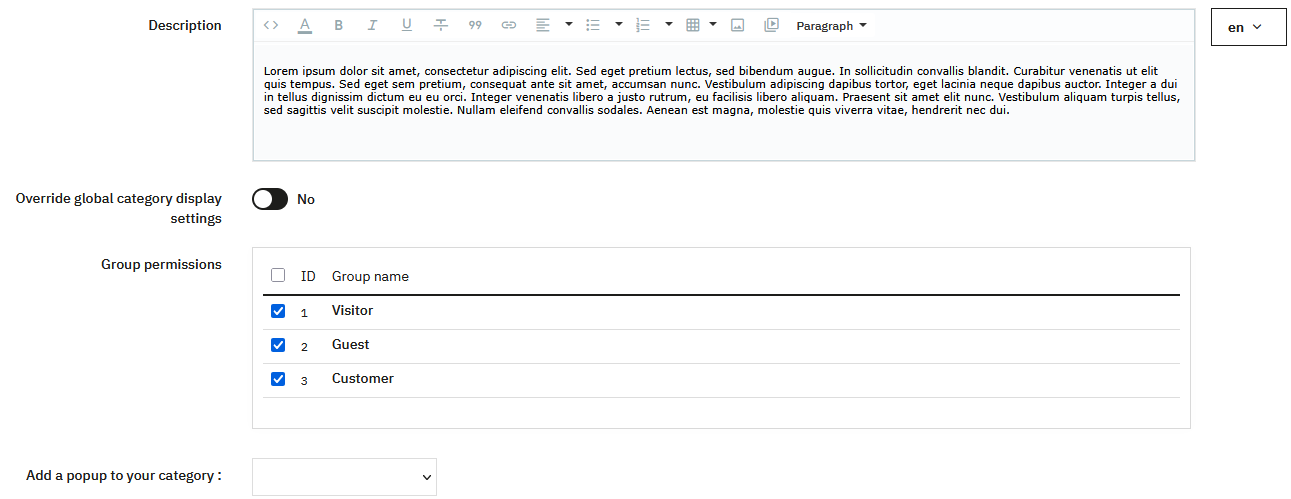
Filling in a category description strengthens your category's relevance and will thus improve your SEO. Categories are multilingual, each field can be filled independently for each language.
Replace Global Display Settings

For a given category, you can replace the global display settings. This allows you to create categories with specific designs:
- Categories in gallery mode with only images
- Categories with a lightweight display
- Categories with a complete display (dates, ratings, authors, categories, intro, etc.)
Permissions and Pop-up
Define access permissions by customer groups for each category. A pop-up can also be associated with a category. If no popup exists, you'll need to create one (see section creating a pop-up).
Category Images
An image can be associated with each category. Depending on the category configuration, it can display as a thumbnail or large image at the top of the page.
Category Order
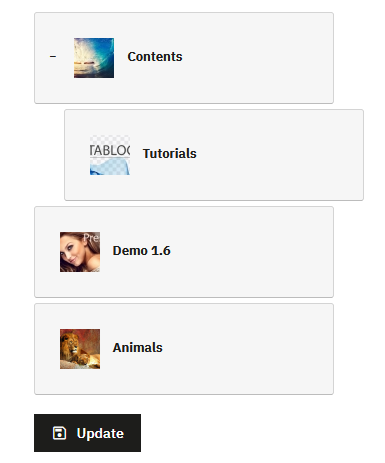
Category order is managed via a drag and drop system. Move a category up or down to change its order, or to the side to place it as a subcategory.
Manage Comments
To manage comments, you must first have enabled comment management in Configuration > Comments.
Comment Management Interface
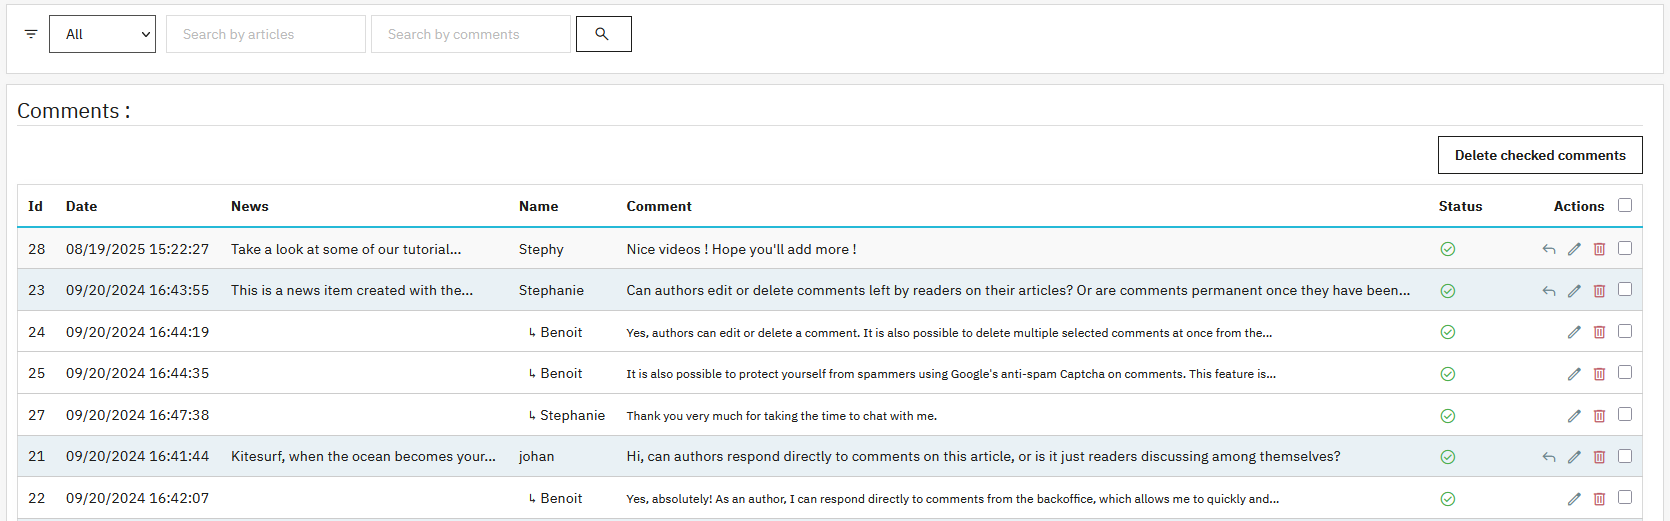
A filter system facilitates searching:
- Filter by comment status
- Search by article title
- Search within comment text
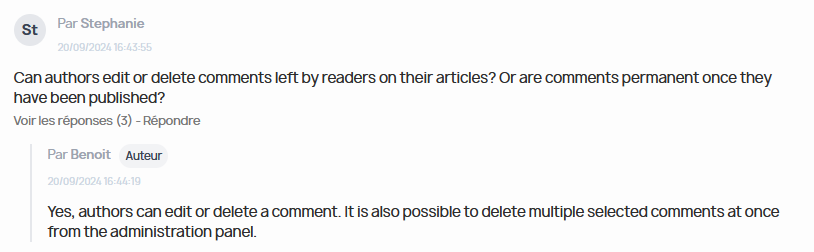
For each comment, several actions are available:
- Reply to the comment
- Change status
- Edit content
- Delete the comment
A checkbox system allows deleting multiple comments in a single action.
Replying to a Comment
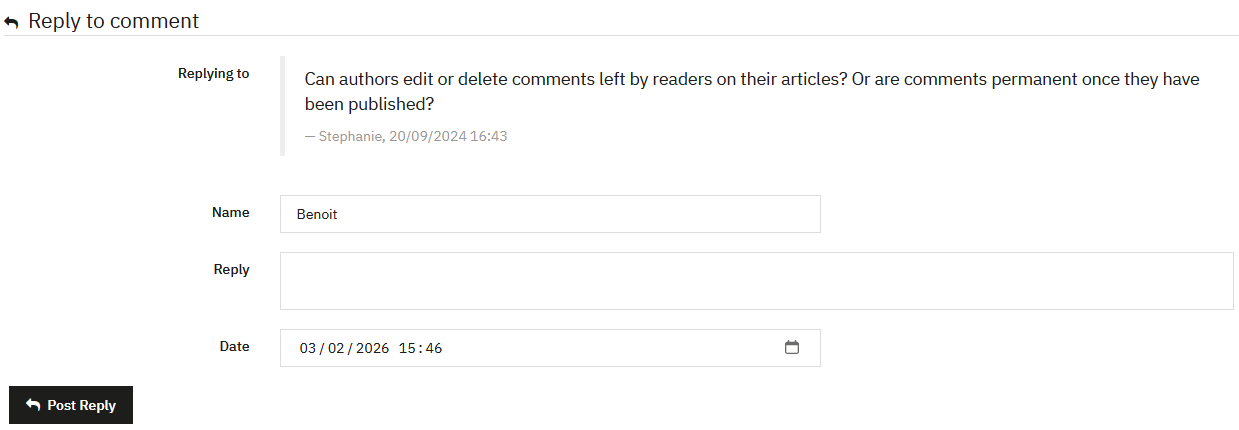
The reply interface allows you to:
- Review the original comment
- Enter a reply
- Change the name of the person replying
- Adjust the reply date
If you are the article author, an author badge is displayed next to your username.
Reply from front-office
You can also reply as author directly from the article on the front-office. Comments posted by logged-in administrators or authors are automatically validated.
Create & Edit Custom Lists
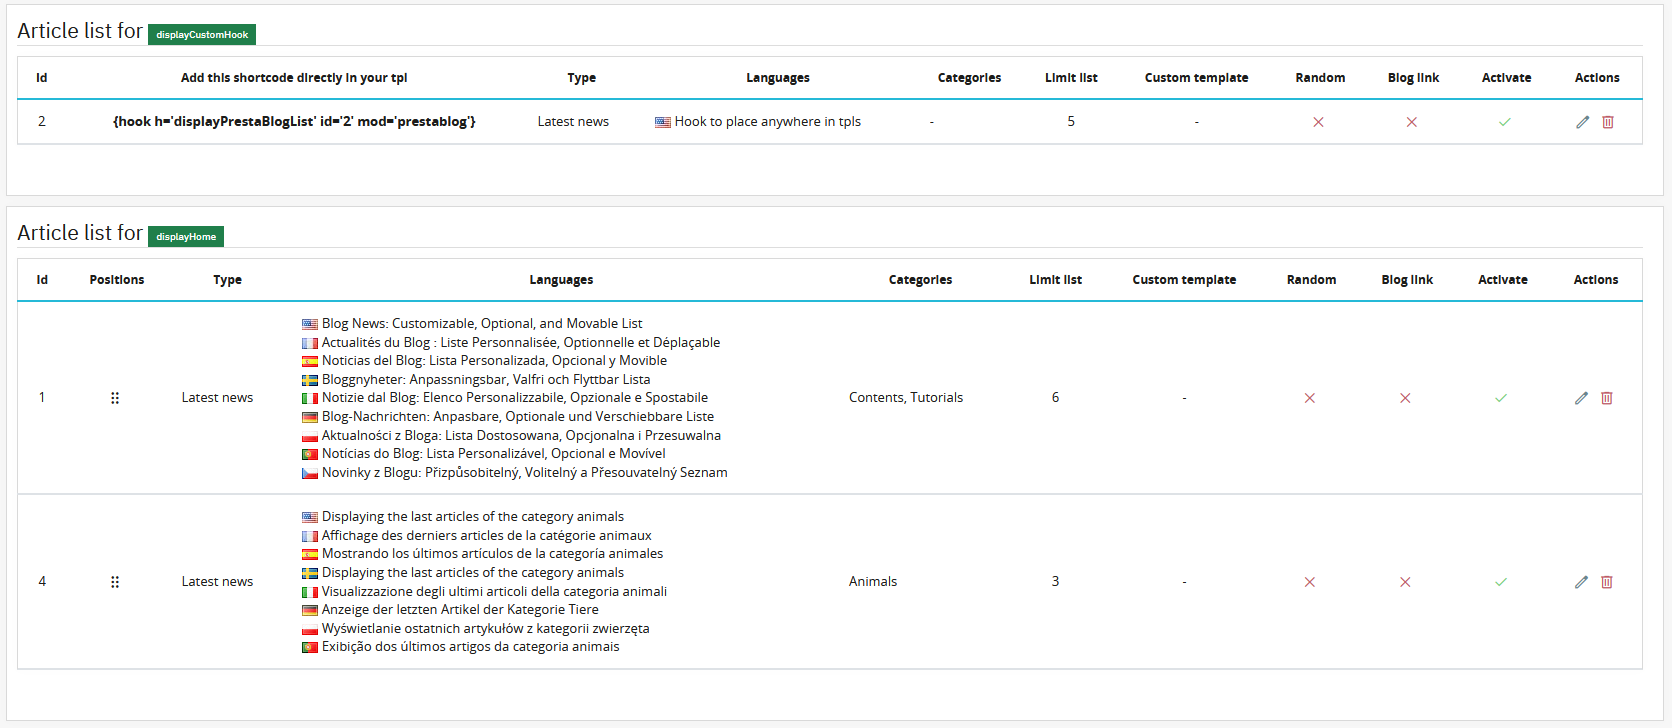
Custom article lists allow you to display blog articles on the homepage, on other pages accepting a shortcode, or directly included in a tpl file of your template (for advanced users).
Access this feature via Content Management > Custom Article List, then click "Create a list".
You can define the information to display and a specific period, for example to highlight a category during a marketing campaign.
You can also set the display width of the list. This option is useful with a full-width or full-page theme to limit the content width and keep a consistent layout.
You can choose the number of display columns, like for the category listing: 1, 2, 3 or 4 columns. You can also hide the title displayed above by disabling the “Show title” option.
The display can be scheduled for a specific period, which makes it possible for example to promote a specific product, highlight a category, support a launch, or run a one-off commercial campaign.
Available Hooks
- DisplayHome: displays the list on the homepage
- DisplayCustomHook: allows inserting code directly into a template tpl
Shortcode example
{hook h='displayPrestaBlogList' id='2' mod='prestablog'}
Create & Edit Popups
Transform your articles into commercial opportunities
Pop-ups allow you to create direct bridges between your content and your products. Offer a promotion on a product mentioned in the blog, invite newsletter signup after 30 seconds of reading, or highlight your best offers: easily configure targeted and non-intrusive pop-ups to boost your conversions.
Before creating a pop-up, verify that the feature is enabled in the module's general configuration or in the blog homepage configuration.
Access the management interface via Content Management > Pop-up.
Pop-up Configuration
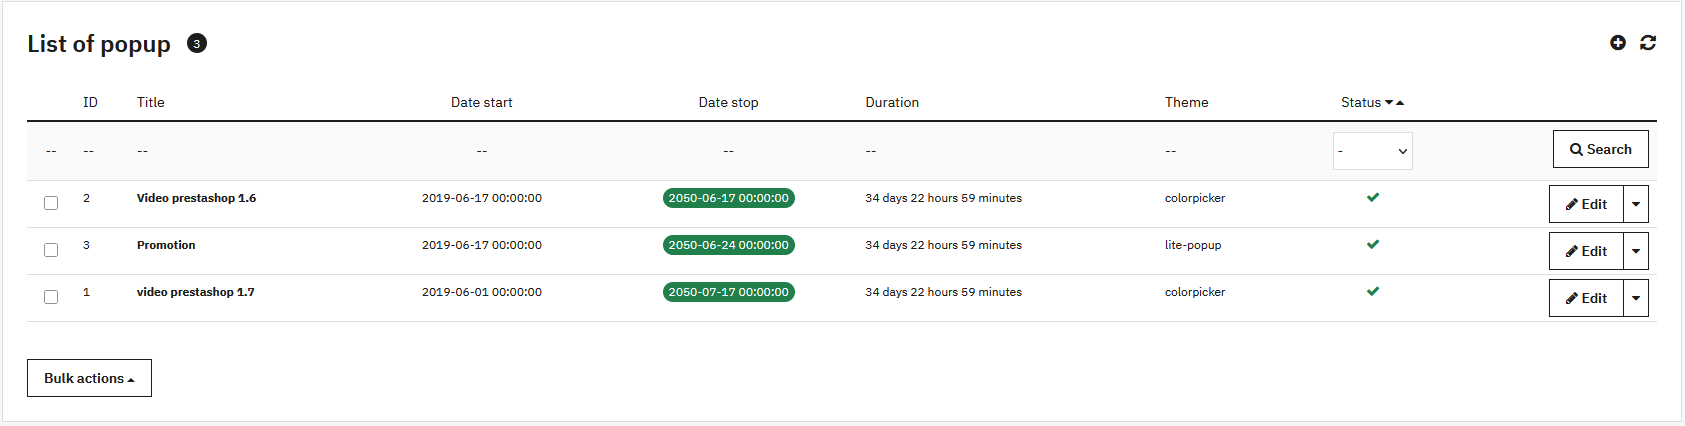
Appearance and Targeting
-
Theme:
- Light Pop-up: clean display with image or video, customizable background
- Color Picker: content with borders, customization of background, text and button
- Customer group: restricts display to certain segments
- Dimensions: width and height in pixels
Scheduling and Behavior
- Activation: puts online or hides the pop-up
- Start and end date: schedule temporary campaigns
- Display delay: seconds before display
- Recurrence (Cookie): avoids display each time the page is shown (0 = display on each visit)
Content
The WYSIWYG editor allows you to write your message, insert visuals, links or CTA buttons. It works like the article editor.
Create & Edit Slideshow
The slideshow allows you to visually highlight certain content or products. It can be enabled on your store's homepage and/or on the blog homepage.
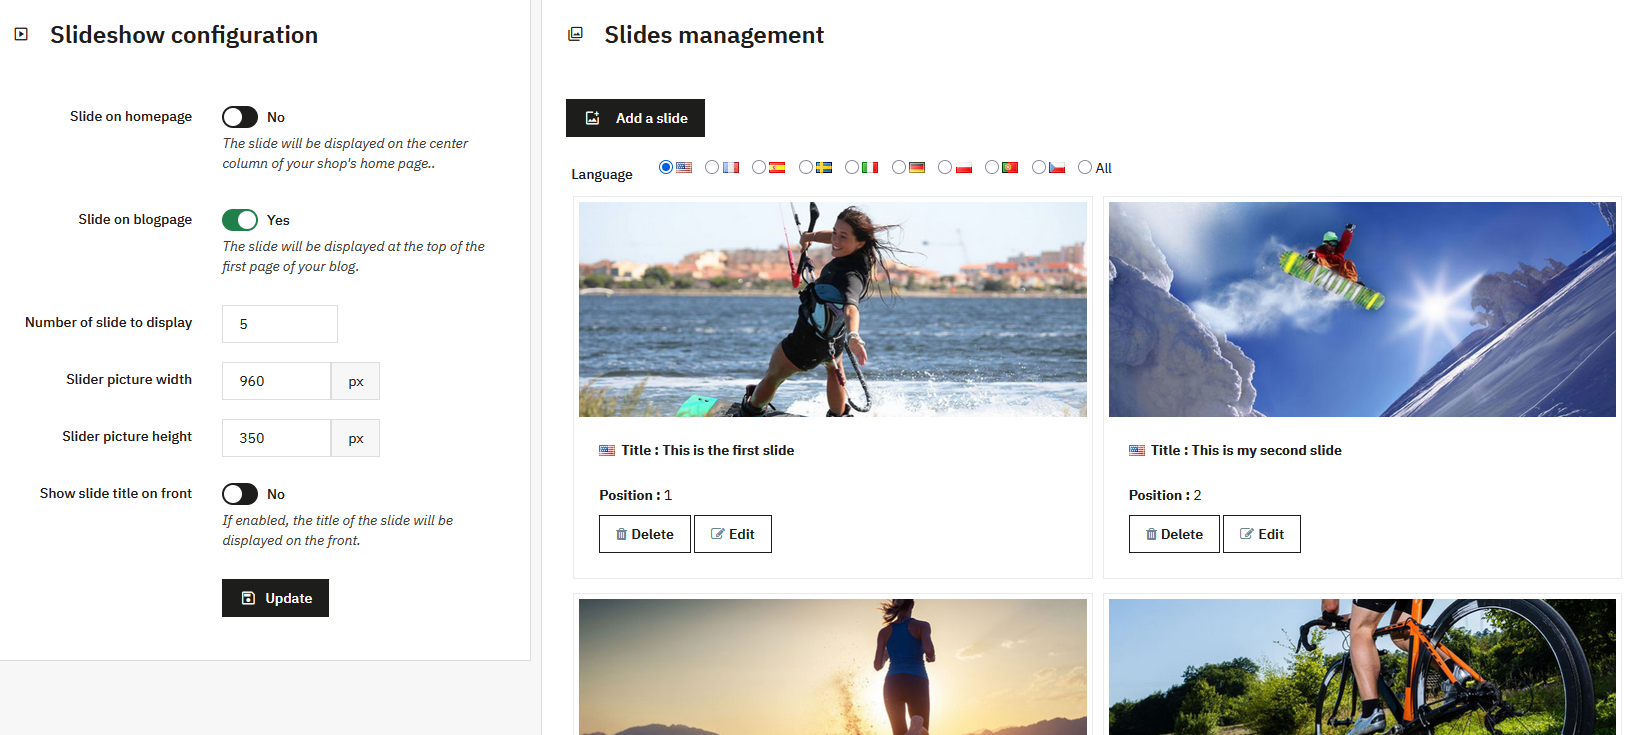
Slideshow Configuration
Slideshow Activation
Two switches allow you to enable the slideshow depending on location:
- Slideshow on homepage: central column of the PrestaShop homepage
- Slideshow on blog page: at the top of the blog article list
Configuration Settings
- Number of slides: recommended between 3 and 10
- Image dimensions: width and height in pixels
- Display title: controls title display on client side
Slide Management
The slide list allows you to view and manage all your slides. Language filtering is available.
Each slide displays:
- The slide image
- The title (with language flag)
- The position in the slideshow
Adding or Editing a Slide
Available Fields
- Language: create for one language or all languages
- Image: respect configured dimensions
- Title: identification in back-office and optional display in front
- URL: optional, makes the slide clickable
- Position: display order (1 = first)
Each slide is linked to a specific language. Modifying a slide in one language does not modify other language versions. For an identical modification across all languages, it may be faster to delete and recreate the slide.