Gestionarea conținutului
Această secțiune acoperă gestionarea completă a conținutului în PrestaBlog: crearea și administrarea articolelor, organizarea categoriilor, moderarea comentariilor, precum și funcționalități avansate precum listele personalizate, pop-up-urile și slideshow-ul.
Creează și editează articole
- Interfața de gestionare a articolelorarrow_forward
- Redactarea articolelorarrow_forward
- Adăugarea și editarea unui articolarrow_forward
- Crearea asistată de AI a articolelorarrow_forward
- SEOarrow_forward
- Imaginea principalăarrow_forward
- Introducere și conținutarrow_forward
- Instrumente PrestaBlog în editorul TinyMCEarrow_forward
- Utilizarea Creative Elementsarrow_forward
- Cuprinsarrow_forward
- Asocierea categoriilorarrow_forward
- Asocierea produselor și a articolelorarrow_forward
Interfața de gestionare a articolelor
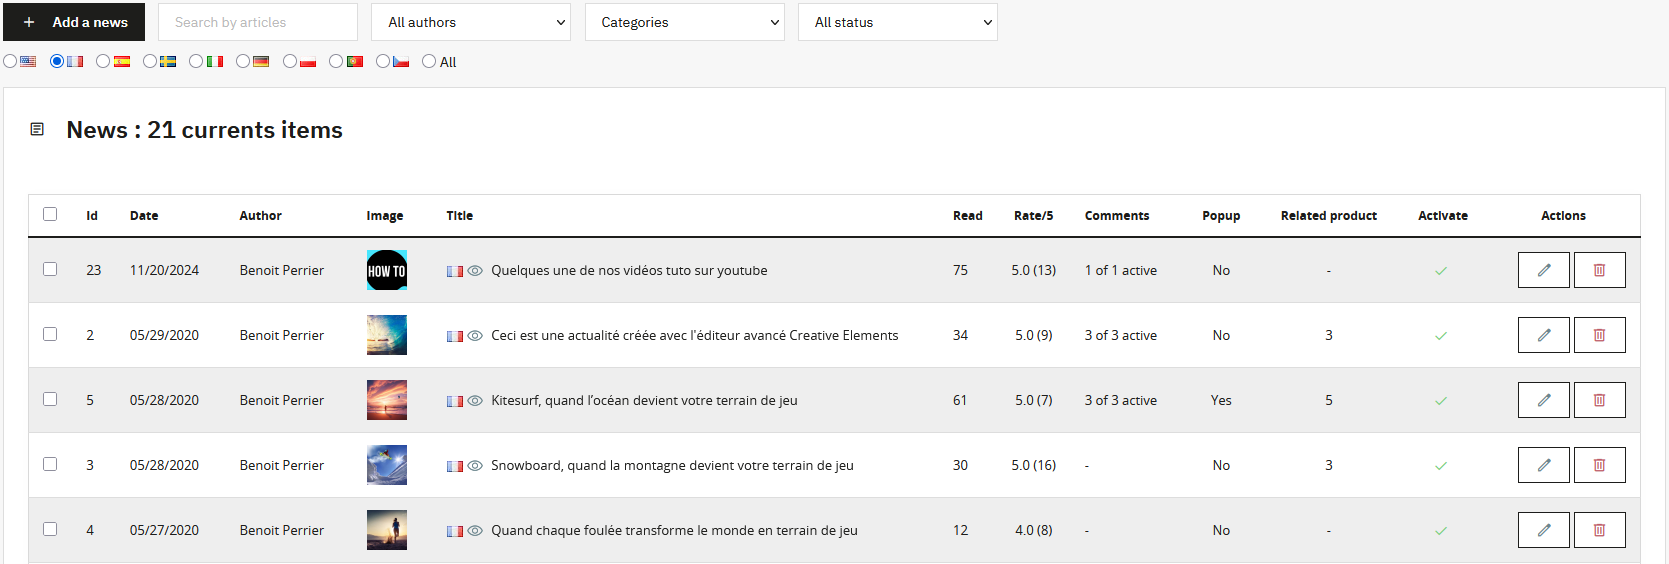
Gestionarea articolelor se bazează pe o interfață dinamică ce se actualizează fără reîncărcarea paginii. Această pagină îți permite să îți cauți conținutul după articol, autor, categorie, status și limbă.
Din această interfață, poți:
- Edita sau șterge un articol individual
- Selecta mai multe articole pentru acțiuni în masă (activare, dezactivare, ștergere)
- Încărca mai multe articole pentru a afișa mai multe rezultate
Redactarea articolelor, inima conținutului tău
Redactarea articolelor este esența vizibilității tale. Ea permite blogului tău să performeze sau, dimpotrivă, să nu își atingă obiectivele.
Este esențial să produci conținut original și util. Copierea conținutului din alte surse creează conținut duplicat, penalizat imediat de motoarele de căutare.
Structura joacă un rol central. Titlul articolului corespunde tag-ului H1 și este unic. Secțiunile principale ar trebui structurate cu titluri H2, iar subsecțiunile cu H3. O ierarhie clară îmbunătățește lizibilitatea și permite motoarelor de căutare să îți evalueze corect conținutul.
Adăugarea și editarea unui articol
La adăugarea sau editarea unui articol, toate câmpurile (titlu, introducere, conținut și câmpuri SEO) sunt multilingve dacă în magazin sunt active mai multe limbi.
Instrumente disponibile la adăugare sau editare:
- Crearea asistată de AI a articolelor, orientată pe structură și SEO link
- Titlul principal al articolului (H1)
- Activarea sau dezactivarea articolului
- Instrumente SEO: rescriere URL, meta title, meta description, cuvinte cheie și redirecționări link
- Imaginea principală a articolului link
- Introducerea și conținutul principal link
- Cuprins bazat pe tag-urile H2, H3, H4 link
- Asocierea cu una sau mai multe categorii link
- Produse și articole asociate link
- Gestionarea datei de publicare
- Asocierea unui pop-up
Crearea asistată de AI a articolelor
PrestaBlog oferă un instrument de creare asistată de AI a articolelor. Utilizarea lui necesită configurarea în prealabil a unei chei API în secțiunea Instrumente > Inteligență artificială. (vezi secțiunea AI)

Acțiuni disponibile prin asistentul AI:
- Discuție liberă: îți permite să discuți liber cu AI-ul pentru a clarifica un punct, a structura o idee sau a explora un subiect. Istoricul conversației este păstrat, permițându-ți să îți construiești progresiv conținutul.
- Găsește idei de subiecte: pornind de la o temă generală, AI-ul sugerează mai multe unghiuri relevante pentru articole. Ideal pentru calendarul editorial și pentru identificarea unor subiecte la care nu te-ai fi gândit.
-
Găsește idei de variații SEO: generează variante de titlu,
cuvinte cheie asociate și idei de subsecțiuni (H2, H3) pentru optimizare SEO.
Această funcție este un punct de plecare excelent înainte de redactare. - Scrie un articol: generează conținut structurat pe baza elementelor furnizate (subiect, plan, cuvinte cheie). Rezultatul respectă ierarhia titlurilor (H2, H3) și poate fi inserat direct în editor. Folosește-l ca bază de lucru pentru personalizare.
- Creează un rezumat: sintetizează conținutul lung într-o introducere concisă. Util pentru a genera rapid câmpul „Introducere” al articolului.
- Creează un meta title: va sugera un meta title legat de articol.
- Creează o meta description: generează o descriere SEO de impact care încurajează click-urile în rezultatele de căutare. Deși are un impact mai mic asupra SEO, rămâne importantă pentru rata de click.
Inserare și traducere
După generarea conținutului, îl poți insera automat în câmpul corespunzător (titlu, introducere, conținut, meta description) sau îl poți traduce într-o altă limbă.
Pentru ca inserarea să funcționeze corect, selectează limba țintă în interfața de editare înainte de a apăsa butonul de inserare.
Conținutul generat de AI trebuie considerat o bază de lucru. Revizuiește, personalizează și îmbogățește sistematic textele generate pentru a-ți adăuga expertiza și tonul.
Chiar dacă rezultatul pare de calitate, conținutul 100% AI, fără intervenție umană, va performa probabil mai slab decât un conținut personalizat.
SEO
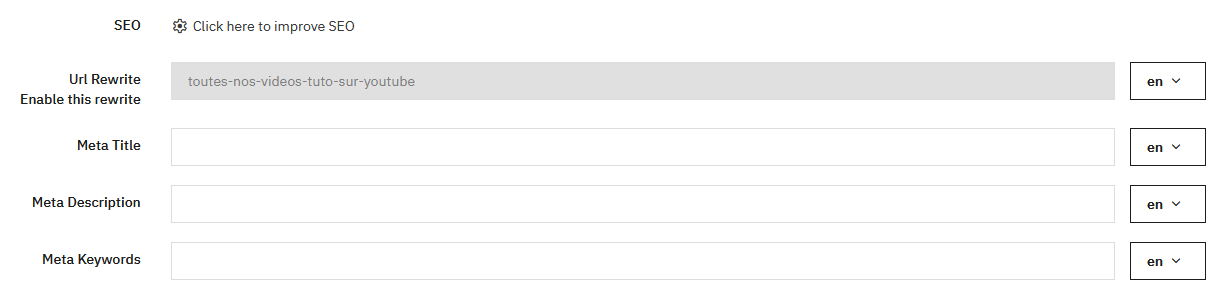
Rescrierea URL-ului este generată automat din titlu atunci când adaugi un articol. După publicare, URL-ul este blocat pentru a evita pierderi SEO. Totuși, poți debloca URL-ul pentru a-l modifica apăsând pe „Activează sau dezactivează rewrite”.
Sfaturi SEO
- Meta title rămâne important, nu depăși 60-70 de caractere
- Meta description are o pondere mică pentru motoarele de căutare
- Meta keywords nu mai sunt folosite
Este disponibil un URL de redirecționare permanentă pentru a redirecționa un articol către altul.
Imaginea principală
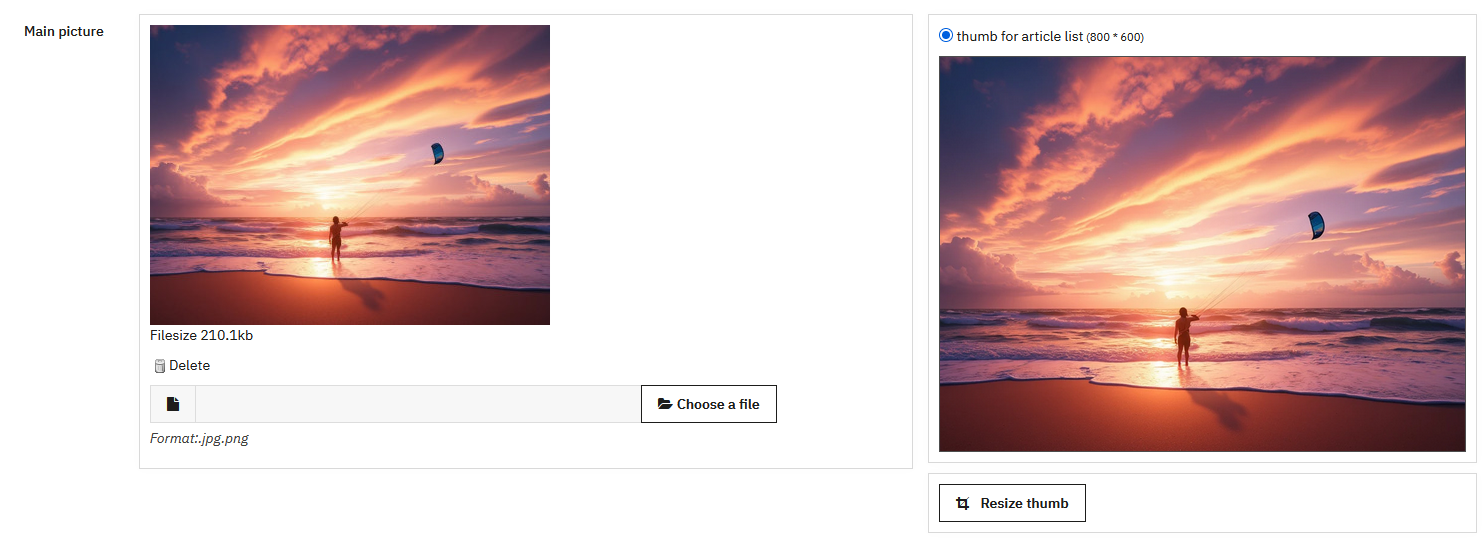
Imaginea principală este încărcată atunci când articolul este salvat. Pentru o randare optimă, încarcă o imagine cu dimensiunile definite în configurarea dimensiunilor imaginilor.
PrestaBlog oferă un instrument de redimensionare pentru a ajusta decuparea. Imaginile sunt generate automat în formatele JPG și WebP în front-office. Totuși, pentru o calitate optimă, recomandăm să decupezi imaginea direct într-un software de editare foto, deoarece redimensionarea pe server poate afecta uneori calitatea imaginii.
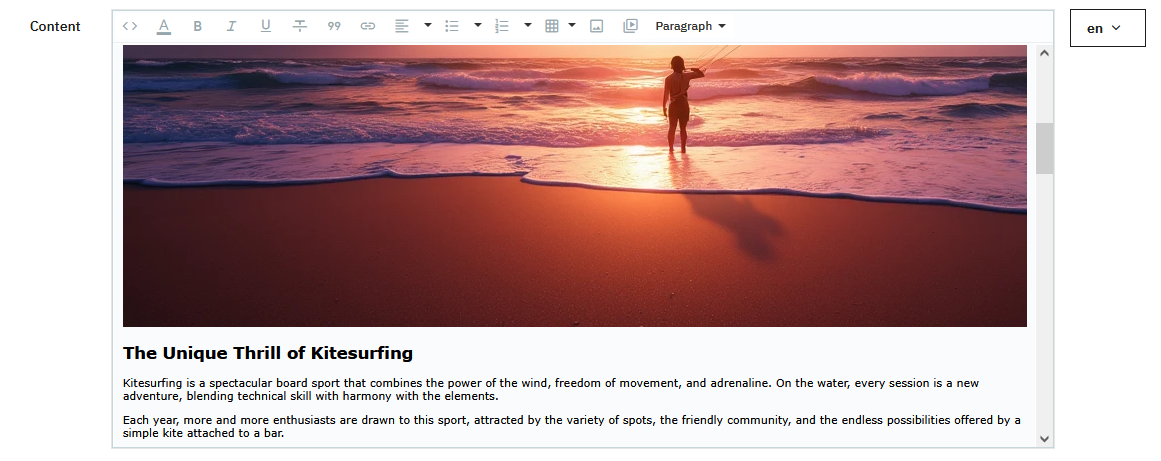
Introducere și conținut
Introducerea este afișată pe paginile de categorie. Ea trebuie să fie diferită de conținutul principal pentru a evita conținutul duplicat.
Conținutul trebuie să fie original, structurat și util. Folosește titluri H2, H3, H4 pentru a organiza articolul. Aerisește textul și integrează imagini ilustrative pentru a capta atenția.
Instrumente PrestaBlog în editorul TinyMCE
PrestaBlog integrează direct în editorul TinyMCE o bară de instrumente dedicată, accesibilă prin fila Instrumente PrestaBlog. Reunește patru funcționalități de machetare care transformă un simplu editor de text într-un adevărat instrument editorial: galerii de imagini, dispunere pe coloane, blocuri FAQ și șabloane reutilizabile.
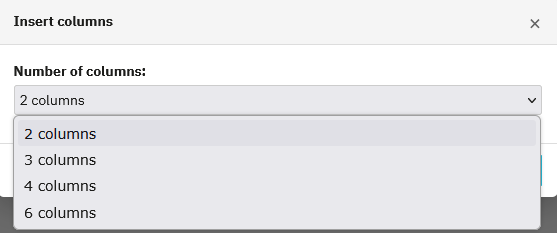
Coloane
Dispunerea pe coloane permite structurarea vizuală a conținutului unui articol în 2, 3, 4 sau 6 coloane. Este instrumentul ideal pentru a aerisi o pagină densă: plasarea unei imagini la stânga și a unui text descriptiv la dreapta, prezentarea mai multor produse alăturate sau organizarea unei liste de puncte cheie într-o grilă lizibilă. Acest tip de machetare, obișnuit pe site-urile profesionale, era până acum imposibil fără a modifica HTML-ul. PrestaBlog îl face accesibil în două clicuri.
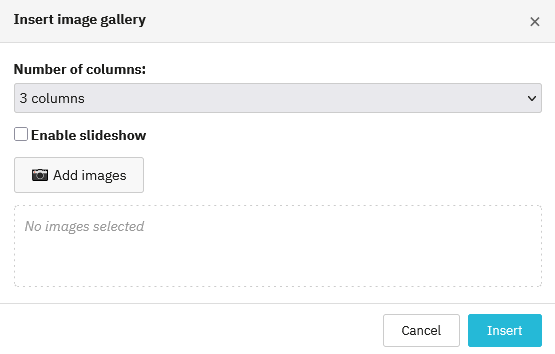
Galerie de imagini
Galeria permite inserarea unui set de imagini în grilă, cu o alegere de la 2 la 6 coloane. O opțiune de diaporamă transformă galeria într-un carusel interactiv, fără niciun plugin suplimentar. Ideal pentru prezentarea fotografiilor de produse, a realizărilor clienților sau pentru ilustrarea unui tutorial în mai mulți pași. Rezultatul este curat, responsive și se integrează natural în fluxul articolului.
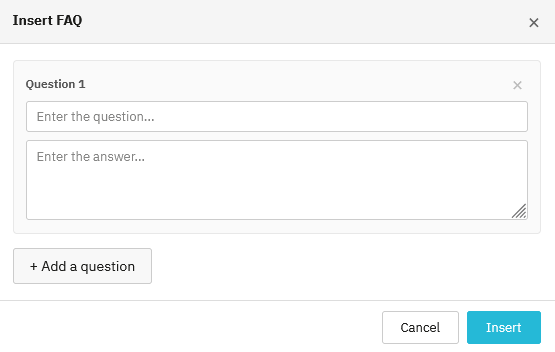
Bloc FAQ
Blocul FAQ permite inserarea de întrebări și răspunsuri direct în corpul unui articol. Fiecare intrare este compusă dintr-o întrebare și un răspuns, putând fi adăugate oricâte sunt necesare. PrestaBlog generează automat marcajul JSON-LD asociat, permițând motoarelor de căutare să interpreteze conținutul ca un FAQ structurat. Rezultat concret: întrebările pot apărea direct în rezultatele Google sub formă de fragmente îmbogățite, crescând semnificativ vizibilitatea articolului.
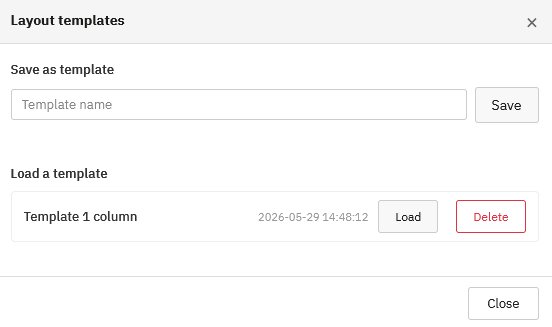
Șabloane de machetare
Odată ce o machetare corespunde nevoilor, combinație de coloane, galerii și blocuri FAQ, aceasta poate fi salvată ca șablon reutilizabil. Un nume, un clic pe „Salvați", și șablonul este disponibil pentru toate articolele următoare. Reprezintă un câștig de timp considerabil pentru echipele care publică regulat conținut cu o structură identică.
Utilizarea Creative Elements

PrestaBlog este compatibil cu Creative Elements pentru crearea de layout-uri avansate. Articolul trebuie salvat mai întâi înainte de a folosi Creative Elements.
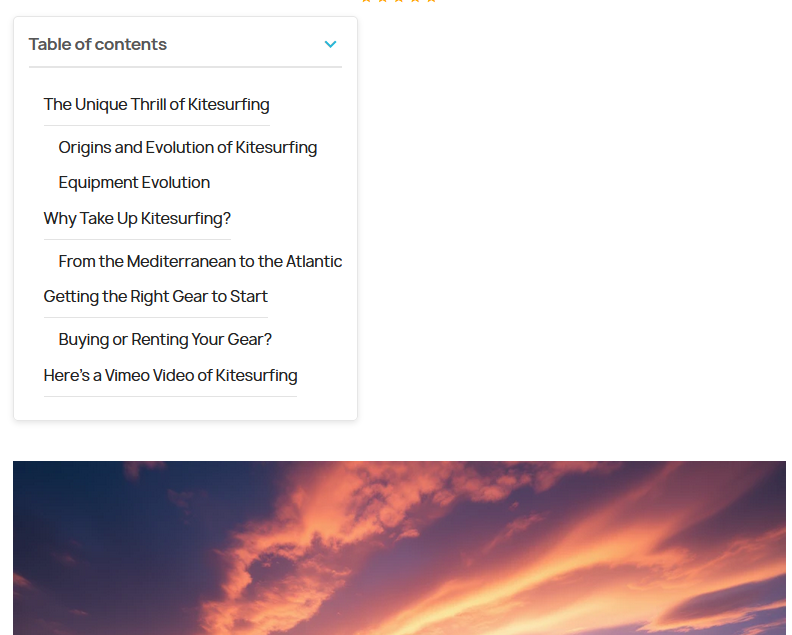
Cuprins
Cuprinsul, dacă este activat, este afișat deasupra articolului. Este generat automat din titlurile prezente în conținut (H2, H3 etc.). Asigură-te că ai paragrafe suficient de lungi pentru ca cuprinsul să fie cu adevărat util; altfel, îți încarcă articolul inutil.
Asocierea categoriilor
Pentru a publica un articol, trebuie să selectezi cel puțin o categorie activă.
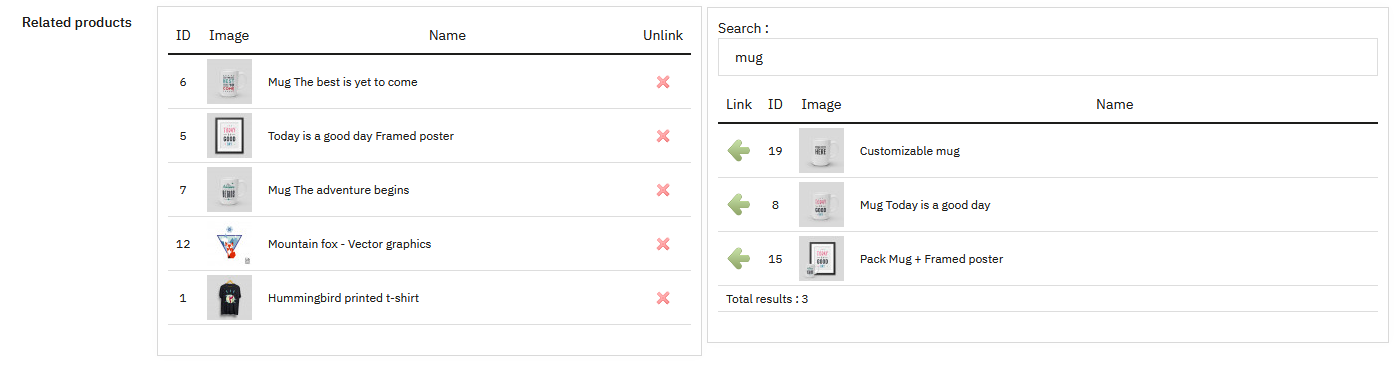
Asocierea produselor și a articolelor
Produsele și articolele asociate sunt căutate după nume sau ID. Ele apar automat după selectare și salvare, în partea de jos a articolelor.
Afișare pe paginile produselor
Pentru ca articolele de blog să fie afișate și pe paginile produselor, activează opțiunea Configurare > Global > Adaugă o filă pe pagina produsului.
Creează și editează categorii
Categoriile sunt punctul de plecare al blogului. O primă categorie implicită este creată automat, permițându-ți să publici articole imediat.
Ulterior, adaugă câte categorii ai nevoie pentru a organiza conținutul. Categoriile facilitează navigarea și contribuie la o mai bună lizibilitate pentru SEO.
Lista categoriilor

Din pagina de gestionare a categoriilor, poți:
- Adăuga o categorie nouă
- Ordonare categorii prin „Ordinea categoriilor”
- Edita o categorie existentă
- Șterge o categorie
Adăugarea și editarea unei categorii
O categorie poate fi activată sau dezactivată. O categorie dezactivată nu este vizibilă în blog, dar rămâne disponibilă în administrare.
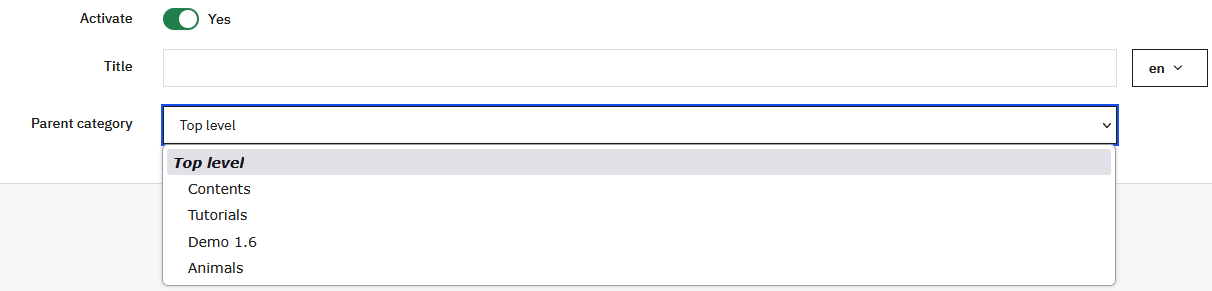
Fiecare categorie are un titlu și poate fi atașată unei categorii părinte pentru a crea un arbore de subcategorii. Nivel superior indică faptul că categoria este la primul nivel.
Câmpuri SEO
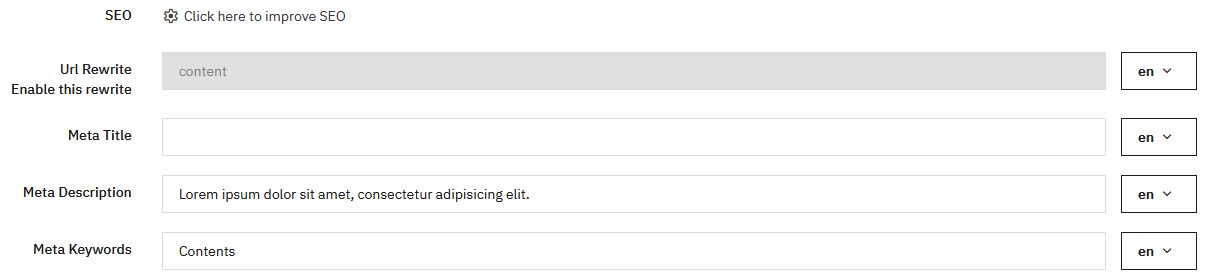
Fiecare categorie are câmpuri SEO clasice:
- Meta title: cel mai important, trebuie să fie concis și orientat SEO
- Meta description: opțional, are o pondere mică pentru Google
- Meta keywords: ignorat de motoarele de căutare
Rescrierea URL-ului este generată automat din titlu, dar rămâne editabilă. Totuși, este blocată ca read-only; pentru a reactiva modificarea, apasă butonul câmpului Activare/Dezactivare.
Descriere și multilingv
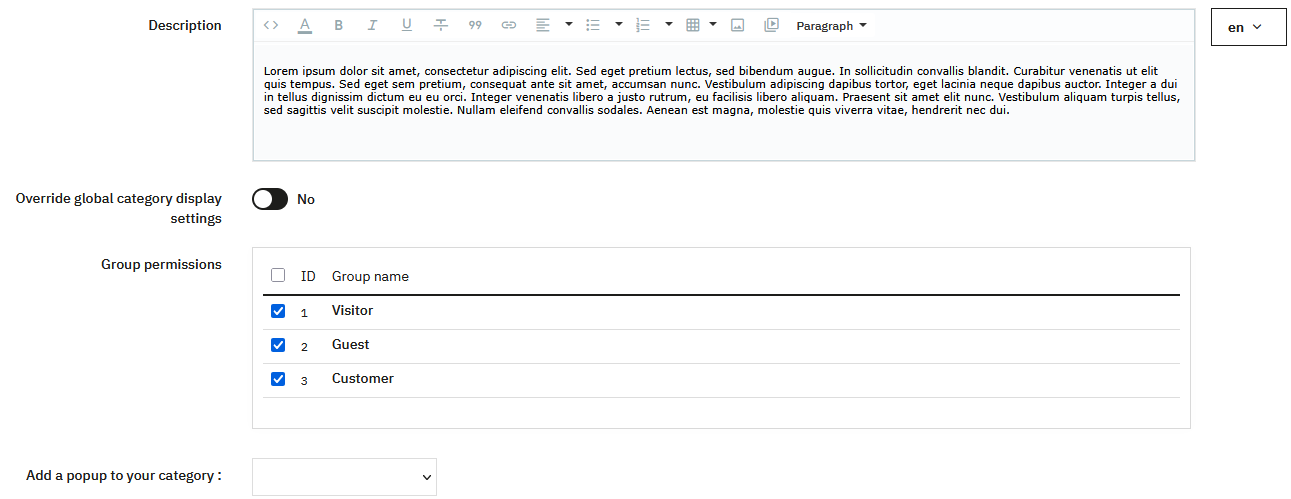
Completarea descrierii unei categorii îi întărește relevanța și îți va îmbunătăți astfel SEO. Categoriile sunt multilingve, fiecare câmp poate fi completat independent pentru fiecare limbă.
Înlocuiește setările globale de afișare

Pentru o anumită categorie, poți înlocui setările globale de afișare. Acest lucru îți permite să creezi categorii cu designuri specifice:
- Categorii în mod galerie doar cu imagini
- Categorii cu afișare minimalistă
- Categorii cu afișare completă (date, rating-uri, autori, categorii, introducere etc.)
Permisiuni și pop-up
Definește permisiunile de acces pe grupuri de clienți pentru fiecare categorie. Un pop-up poate fi asociat și unei categorii. Dacă nu există niciun pop-up, va trebui să creezi unul (vezi secțiunea crearea unui pop-up).
Imagini de categorie
O imagine poate fi asociată fiecărei categorii. În funcție de configurarea categoriei, ea poate fi afișată ca miniatură sau ca imagine mare în partea de sus a paginii.
Ordinea categoriilor
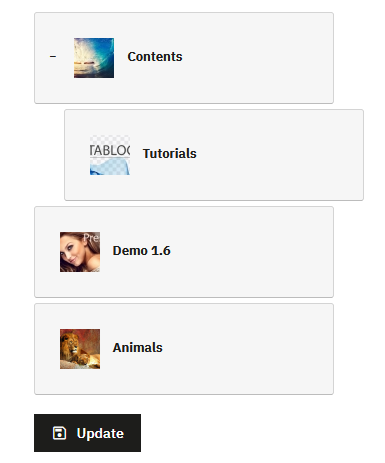
Ordinea categoriilor este gestionată printr-un sistem drag-and-drop. Mută o categorie în sus sau în jos pentru a-i schimba ordinea sau lateral pentru a o plasa ca subcategorie.
Gestionarea comentariilor
Pentru a gestiona comentariile, trebuie mai întâi să activezi gestionarea comentariilor în Configurare > Comentarii.
Interfața de gestionare a comentariilor
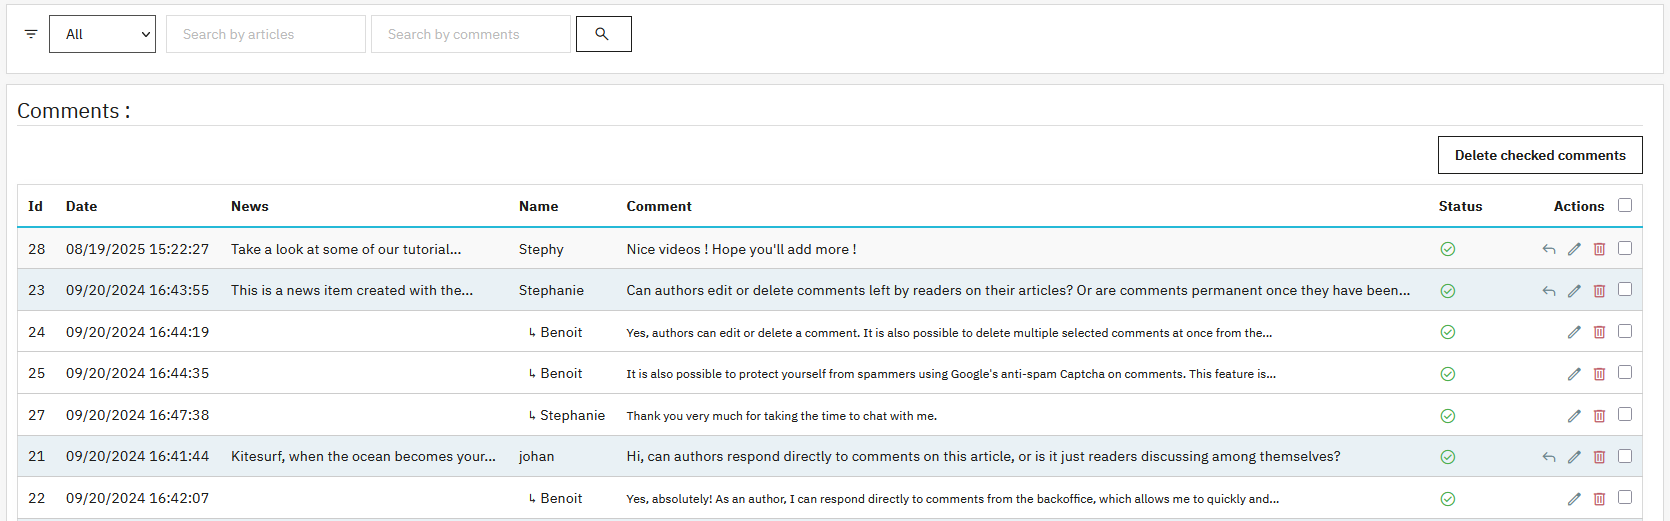
Un sistem de filtre facilitează căutarea:
- Filtrare după statusul comentariului
- Căutare după titlul articolului
- Căutare în textul comentariului
Pentru fiecare comentariu, sunt disponibile mai multe acțiuni:
- Răspunde la comentariu
- Schimbă statusul
- Editează conținutul
- Șterge comentariul
Un sistem de bifare permite ștergerea mai multor comentarii într-o singură acțiune.
Răspuns la un comentariu
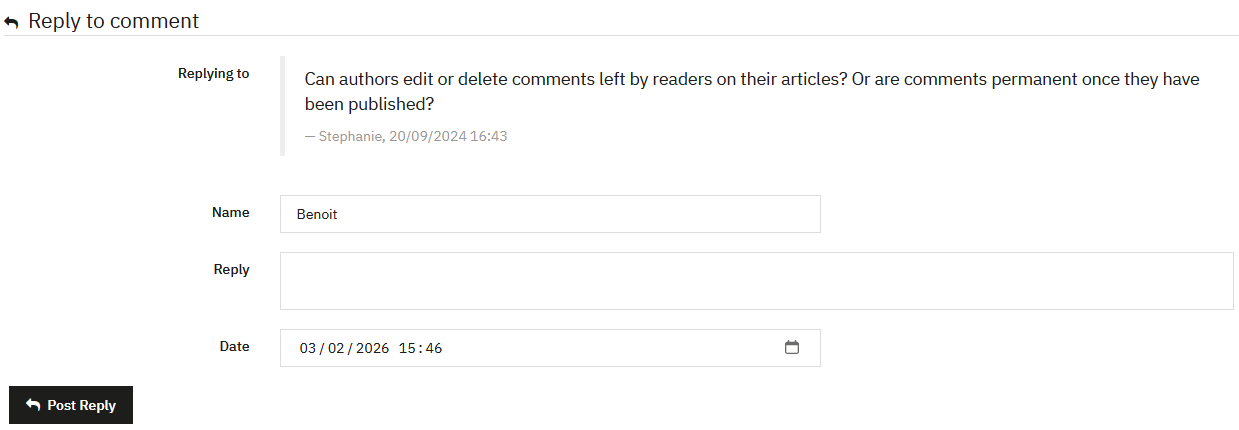
Interfața de răspuns îți permite să:
- Revizuiești comentariul inițial
- Introduci un răspuns
- Schimbi numele persoanei care răspunde
- Ajustezi data răspunsului
Dacă ești autorul articolului, este afișată o insignă de autor lângă numele tău.
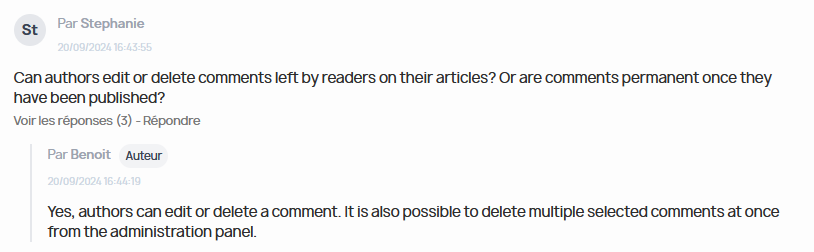
Răspuns din front-office
Poți răspunde ca autor direct din articol, în front-office. Comentariile postate de administratori sau autori autentificați sunt validate automat.
Creează și editează liste personalizate
Listele personalizate de articole îți permit să afișezi articolele de blog pe pagina principală, pe alte pagini care acceptă un shortcode sau direct într-un fișier tpl al temei (pentru utilizatori avansați).
Accesează această funcționalitate din Gestionarea conținutului > Listă personalizată de articole, apoi apasă pe „Creează o listă”.
Poți defini informațiile de afișat și o perioadă specifică, de exemplu pentru a evidenția o categorie în timpul unei campanii de marketing.
Este de asemenea posibil să definești lățimea de afișare a listei. Această opțiune este utilă în cazul unui șablon full width sau full page, pentru a limita lățimea conținutului și a păstra un layout coerent.
Poți alege numărul de coloane de afișare, la fel ca pentru listarea categoriilor: 1, 2, 3 sau 4 coloane. Poți ascunde și titlul afișat mai sus, dezactivând opțiunea "Show title".
Afișarea poate fi programată pe o perioadă specifică, ceea ce permite, de exemplu, promovarea unui produs anume, evidențierea unei categorii, susținerea unei lansări sau a unei acțiuni comerciale punctuale.
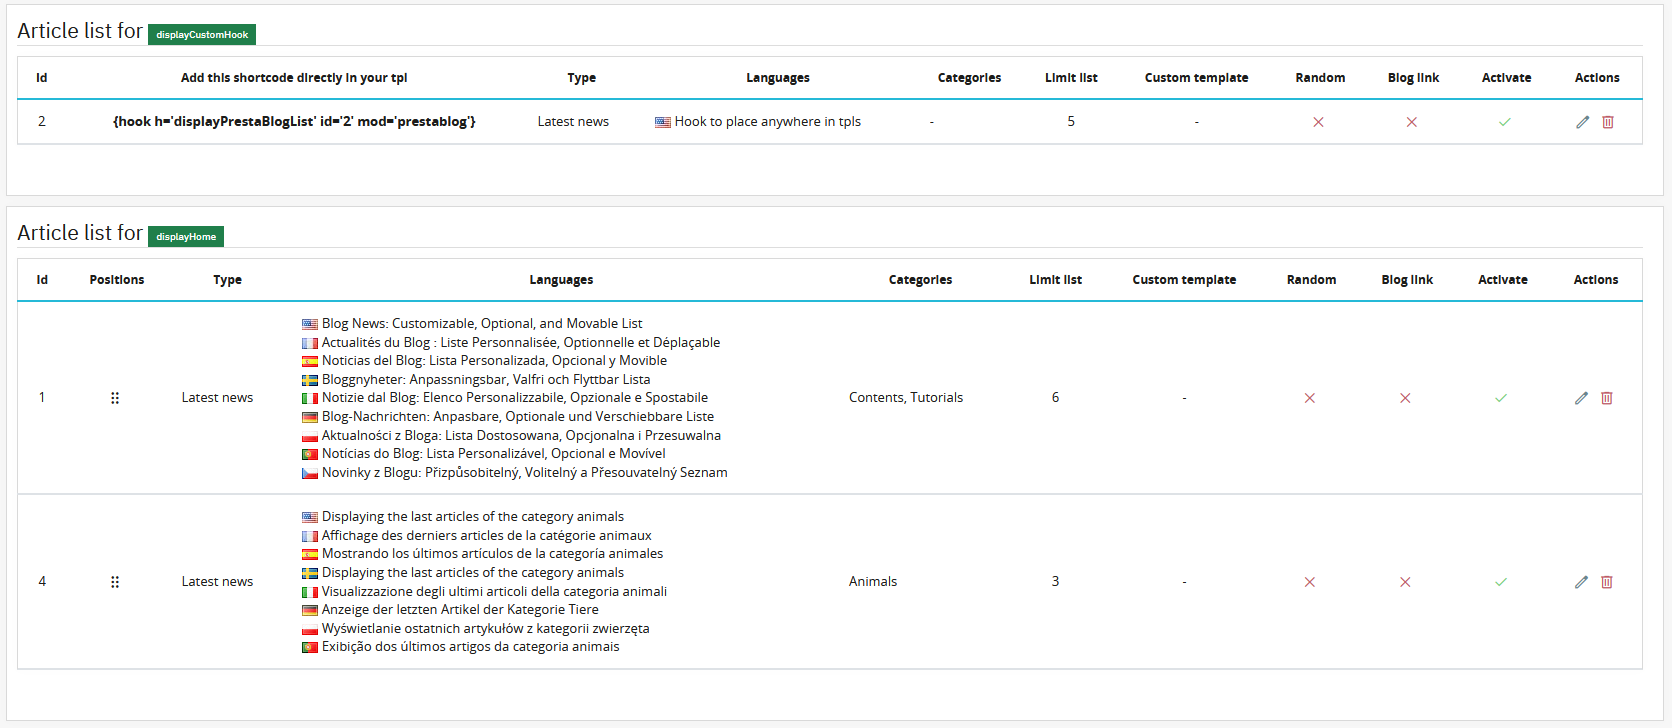
Hook-uri disponibile
- DisplayHome: afișează lista pe pagina principală
- DisplayCustomHook: permite inserarea codului direct într-un template tpl
Exemplu de shortcode
{hook h='displayPrestaBlogList' id='2' mod='prestablog'}
Creează și editează pop-up-uri
Transformă articolele în oportunități comerciale
Pop-up-urile îți permit să creezi punți directe între conținut și produsele tale. Oferă o promoție la un produs menționat în blog, invită la abonarea la newsletter după 30 de secunde de lectură sau evidențiază cele mai bune oferte: configurează ușor pop-up-uri targetate și non-intruzive pentru a-ți crește conversiile.
Înainte de a crea un pop-up, verifică dacă funcționalitatea este activată în configurarea generală a modulului sau în configurarea paginii principale a blogului.
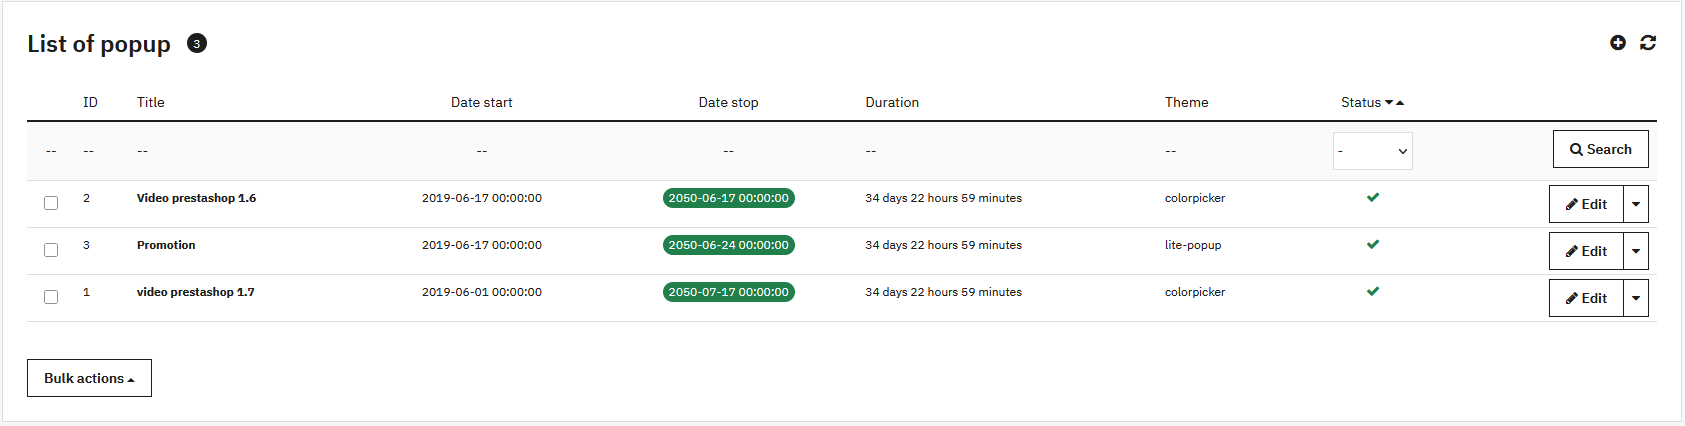
Accesează interfața de gestionare din Gestionarea conținutului > Pop-up.
Configurarea pop-up-ului
Aspect și targetare
-
Temă:
- Light Pop-up: afișare curată cu imagine sau video, fundal personalizabil
- Color Picker: conținut cu chenar, personalizare fundal, text și buton
- Grup de clienți: restricționează afișarea la anumite segmente
- Dimensiuni: lățime și înălțime în pixeli
Programare și comportament
- Activare: publică sau ascunde pop-up-ul
- Data de început și sfârșit: programează campanii temporare
- Întârziere la afișare: secunde înainte de afișare
- Recurență (Cookie): evită afișarea la fiecare vizualizare a paginii (0 = afișează la fiecare vizită)
Conținut
Editorul WYSIWYG îți permite să scrii mesajul, să inserezi imagini, link-uri sau butoane CTA. Funcționează la fel ca editorul de articole.
Creează și editează slideshow-ul
Slideshow-ul îți permite să evidențiezi vizual anumite conținuturi sau produse. Poate fi activat pe pagina principală a magazinului și/sau pe pagina principală a blogului.
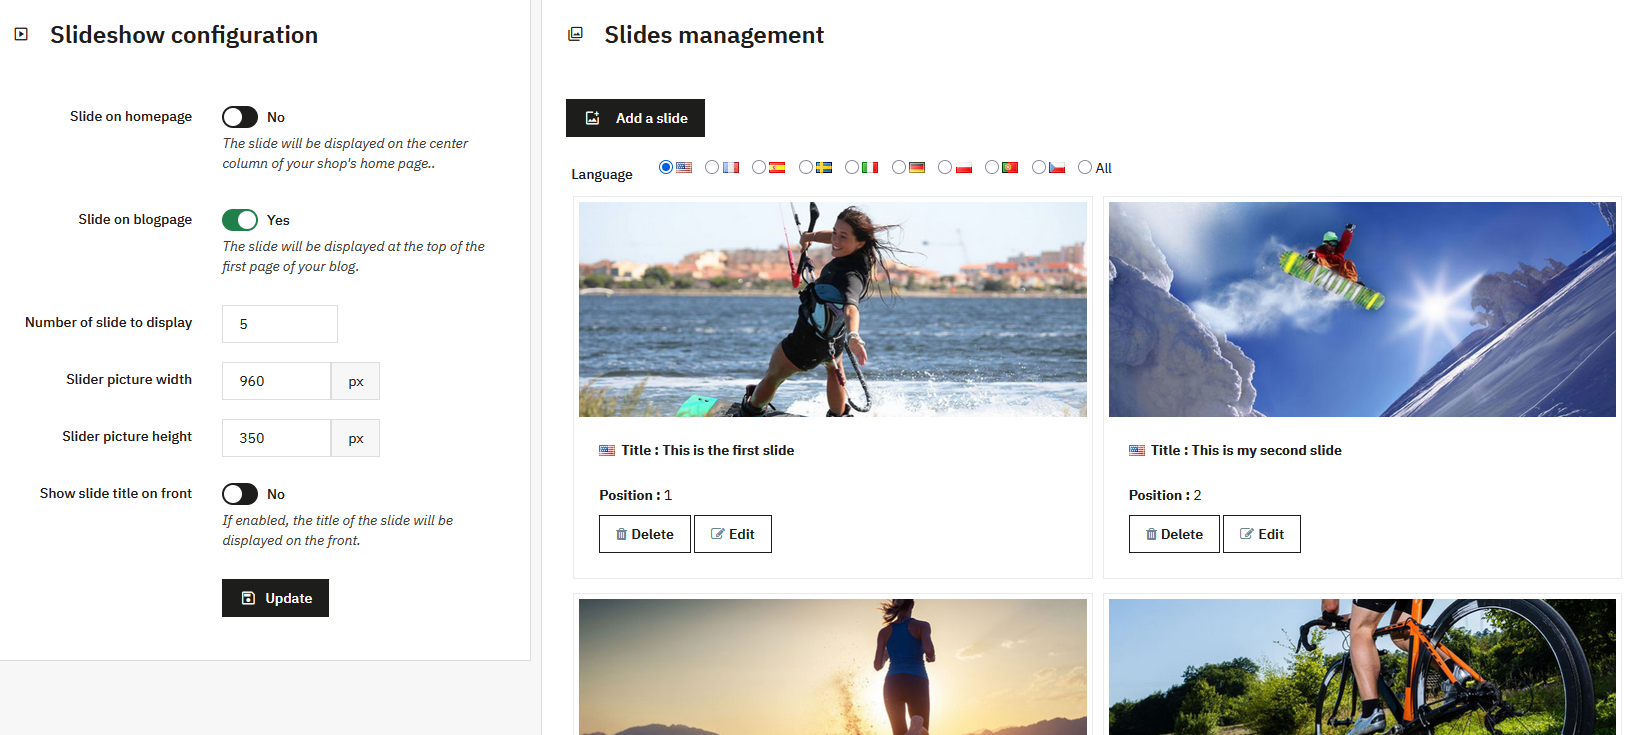
Configurarea slideshow-ului
Activarea slideshow-ului
Două comutatoare îți permit să activezi slideshow-ul în funcție de locație:
- Slideshow pe pagina principală: coloana centrală a paginii principale PrestaShop
- Slideshow pe pagina blogului: în partea de sus a listei de articole din blog
Setări de configurare
- Numărul de slide-uri: recomandat între 3 și 10
- Dimensiuni imagine: lățime și înălțime în pixeli
- Afișează titlul: controlează afișarea titlului pe partea client
Gestionarea slide-urilor
Lista de slide-uri îți permite să vezi și să gestionezi toate slide-urile. Filtrarea pe limbi este disponibilă.
Fiecare slide afișează:
- Imaginea slide-ului
- Titlul (cu steagul limbii)
- Poziția în slideshow
Adăugarea sau editarea unui slide
Câmpuri disponibile
- Limbă: creează pentru o limbă sau pentru toate limbile
- Imagine: respectă dimensiunile configurate
- Titlu: identificare în back-office și afișare opțională în front
- URL: opțional, face slide-ul clickabil
- Poziție: ordinea de afișare (1 = primul)
Fiecare slide este legat de o limbă specifică. Modificarea unui slide într-o limbă nu modifică versiunile din celelalte limbi. Pentru o modificare identică în toate limbile, poate fi mai rapid să ștergi și să recreezi slide-ul.